Pages

Tuesday, April 28, 2009

Chocolate Mint Cake - Die Die Must Try This...

Not many has eaten this cos it was a very small cake (6")... but the lucky ones who get to eat this say this is the best cake they have tasted so far.

I like the pronounced taste and smell of peppermint and the richness from the chocolate ganache.

I kept this recipe for a long long while but never made it partly because the method is rather uncoventional (you first mixed the butter with flour first, then add to the whisked egg misture), partly because I read from a forum NOT to use Peppermint Essence as the taste will be very pastic.

It set my mind to ease after reading the review here. Well, I can assure you I have neither problem with the method nor the plasticky-taste!

For the essence, I use Lor Ann Creme de Methe Concentrated Flavouring.
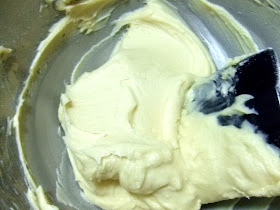
The butter and flour paste:

You can smell the mintiness when the cake is about to be ready:
I do not have the 8" pan, so I used the 6". Ended up the cake is too tall to bake evenly. The top and side becomes too dry after sitting in the oven for more than 60min. Also, half way thru I inserted the baking core... which in turns upset the brown and green swirling:

Also the cake has a tall crown which I sliced it off to feed the salivating baker! That's why the final cake here didn't look as tall as it should be.

As for the frosting, I used equal amount of Nestle Pouring Cream (the type that comes in a tin) and valrhona chocolate to make ganache. The nestle cream has the advantage of being able pipe right away but I feel the taste has been compromised. Next time I would certainly make this with dairy whipping cream.

I hope you will try this out too!

Monday, April 27, 2009

Happy 1st Anniversary!

I just crossed my first year of blogging 3 days ago.

Looking back, I do not think my baking has improved a great deal. Perhaps I am never the type who is up for challenging stuff (read: macaron). Or I never want to spend time on what-I-think-is-superficial decoration which will eventually end up as a mess in some tummy anyway. Yep, I am quite a utilitarian in that sense. C'mon, after a hard day work, all I want is to unwind through leisure bake with the intend to give my family a healthier choice. I do not want another nerve breaking session like my day job.

Another thing, I noticed my post have been dwindled to 2 a week... and it's a matter of time before it down to a weekly affair. One main reason being WORK... those who know me knew that I have moved into a new role. It is a understatement to say I overworked... I literally being consumed by my job. Oh man, now I wonder if I had a raw deal :-)

Not to say that my previous job is easy... I get many excitements and heart-attacks from my work but at the end of the day when I step out of office, be it 5pm or 9pm, I know I have the rest of the evening to myself. Now, with a boss based in London... I won't be surprised if my phone goes ringing now!

To be honest, I started this blog as a platform so that I can share what I know, and learn what I don't from other bloggers. It is taking up my time, but gives me equal amount of satisfaction. But given the type of pressure, I wonder how long I can keep blogging...

Sorry for the not-so-happy anniversary post.

Saturday, April 25, 2009

50% Whole Wheat Sandwich Bread (Sponge & Dough)


After the previous yummy cream cheese bread , I was roaring to try out this 50% wholemeal recipe which I found on epicurious using the newly bought organic wholemeal flour!

I attempt to make this with bare hands. Not exactly a big mistake cos I had always make my bread with some hand kneading using Dan Lepard's method. The real mistake trying to pass off my two hands as the mixer.... if you know what I mean.

In Dan Lepard method, you mix all the ingredients together then let it rest for 10 min, knead for 8sec, rest for 10min etc.

In this baking session, I replace my hand knead in the instruction that says "stand mixer".... in the end, all I could recall was a shaggy untennable mess of dough which I was struggling to shag off, and in the process added 1/2 cup more of flour!

Apart from my own silliness, this is a good recipe. The instruction is so clear and detailed that you never need to stare into the humid air and wonder what's next.


********************************************

50% Whole Wheat Sandwich Bread
recipe taken from here

This is a whole-wheat version of basic white sandwich bread. It's a little less soft but a lot more wheat-y and substantial. The use of bread flour gives this bread a lighter texture, while the milk powder and oil help soften it.

TIME SCHEDULE:
Dough starter (sponge): minimum 1 hour, maximum 4 hours (or overnight refrigerated)
Minimum rising time (including starter): about 4 hours
Oven temperature: 450°F, then 400°F
Baking time: 40 to 50 minutes

Ingredients
Sponge:
1 1/2 cups (12 ounces/336 grams) water, room temperature (70°F to 90°F)
2 tablespoons honey
1 3/4 cups (8.7 ounces/244 grams) whole-wheat flour
1/2 teaspoons instant yeast (also known as rapid-rise or bread machine yeast)

Dough:
3/4 teaspoons instant yeast
1 2/3 cups (8.7 ounces/244 grams) Gold Medal "Better for Bread" flour*
3 tablespoons non-fat dry milk powder
2 tablespoons vegetable oil
1 1/2 teaspoons fine sea salt

*If unavailable substitute 1/2 cup plus 1/3 cup (4.4 ounces/122 grams) bread flour and 1/2 cup plus 1/3 cup (4.4 ounces/122 grams) unbleached all-purpose flour.

Preparation
Make dough starter (sponge):
In bowl of stand mixer fitted with whisk attachment, whisk together water, honey, whole-wheat flour, and 1/2 teaspoon yeast until very smooth, about 3 minutes.

In medium bowl, whisk together "Better for Bread" flour, milk powder, and remaining 3/4 teaspoon yeast. Sprinkle mixture over whole-wheat flour mixture (sponge) in bowl of mixer to form blanket on top of sponge. Cover bowl tightly with plastic wrap and let stand at least 1 hour, preferably up to 4 hours. (Starter can be made ahead and refrigerated, tightly covered with plastic wrap, overnight. There is no need to bring starter to room temperature before proceeding.)

Mix dough:
Attach dough hook to stand mixer and mix starter on low (#2 on Kitchen Aid) until rough dough forms, about 1 minute. Scrape down sides of bowl, then cover tightly with plastic wrap and let dough rest 20 minutes. Add vegetable oil and mix on low until incorporated, about 30 seconds. Add salt and mix on low until dough is smooth, sticky enough to cling to fingers, and pulls away completely from bowl, about 7 minutes. If dough is not sticky, using spray bottle, spray with small amount of water and briefly knead by hand just until sticky.

First Rise:
Using vegetable oil or nonstick vegetable-oil spray, lightly oil 3-quart or larger bowl (or dough-rising container). Transfer dough to bowl and lightly oil or spray top of dough. Using tape, mark outside of bowl to approximately double current height of dough. Cover container tightly with plastic wrap and let dough rise in warm place (75°F to 80°F, see Chef's Notes) until doubled in size, 1 to 1 1/2 hours.

Using oiled dough scraper or spatula, transfer dough to lightly oiled work surface.

Gently stretch bottom of dough and fold up to center, then repeat with left side, right side, and top. Round dough package then transfer to bowl, smooth side up, and lightly oil or spray top of dough. Using tape, mark outside of bowl to approximately double current height of dough. Cover bowl tightly with plastic wrap and let dough rise in warm place until doubled in size and depression holds when pressed gently with fingertip, about 1 hour.

Shaping dough and final rise:
Transfer dough, smooth side down, to lightly floured work surface and press gently to flatten to about 1/2-inch thickness. (Dough will still be slightly sticky but use only as much flour on work surface as absolutely necessary to prevent sticking.) Lightly coat sheet of plastic wrap with vegetable oil or nonstick vegetable-oil spray. Cover dough with oiled plastic wrap and let rest 20 minutes.

Lightly coat loaf pan with vegetable oil or nonstick vegetable-oil spray. Using fingertips, dimple dough all over to eliminate air bubbles, then shape into rectangle about twice size of loaf pan. Fold right-hand-side of rectangle over to just past center, then fold left-hand-side over to meet right-hand-side. Roll down top edge of dough, using thumbs to push dough down and away from you. Continue rolling until you reach bottom then use thumbs to press and seal bottom edge. Transfer dough to prepared pan (dough should fill pan to 1/2 inch from top). Lightly coat sheet of plastic wrap with vegetable oil or nonstick vegetable-oil spray and gently cover pan with oiled wrap.

Let dough rise in warm place until highest point is about 1 1/2 inches above sides of pan and depression very slowly fills in when pressed gently with fingertip, about 1 hour. Using razor or thin sharp knife, make 1/2 inch deep lengthwise slash along top of bread.

Bake bread:
While dough is rising, position rack near bottom of oven and top with baking stone or heavy baking sheet. Set aluminum-foil-lined cast-iron pan or heavy rimmed baking pan on floor of oven and preheat oven to 450°F for 1 hour.

Using spray bottle, spray top of dough with water. Quickly transfer bread to hot baking stone (see Chef's Notes) and add 1/2 cup ice cubes to pan beneath.

Bake bread, rotating pan 180 degrees halfway through, until top is golden brown and skewer inserted in middle comes out clean (instant read thermometer inserted into center will register about 205°F), 40 to 50 minutes. Transfer bread from pan to rack to cool completely. Serve warm or at room temperature.

Chef's Notes:
  • Dough rises best around 75ºF to 80ºF. If your house is on the cold side, you can set a container of very hot tap water near the rising dough and cover the dough and the hot water with a large plastic container or bowl—you will need to reheat the water every 30 to 40 minutes. Alternatively you can place the dough (and the small container of very hot water) in a microwave oven (not turned on!) or a standard oven without a pilot light, but with the oven light turned on to provide gentle heat.

  • If you want to make this bread over a 2-day period, you can refrigerate it overnight after the first rise. Once it has doubled in size (first rise), gently press the dough down in the bowl, then cover with plastic wrap that has been lightly coated with vegetable oil or nonstick vegetable-oil spray and refrigerate. The next day, bring the dough to room temperature at least 1 hour before shaping and baking the loaf. Keep in mind that the time in the refrigerator replaces the second rise so there is no need for a second rise.

  • For proper texture, it's important for the bread to get a blast of heat as soon as it goes into the oven. For this reason, the oven needs to be preheated for a full hour, and it's important not to let too much heat escape when you put the bread in. When transferring the dough to the oven to bake, be sure to shut the door quickly.


THE DOUGH PERCENTAGE
flour: 100%
water: 70.6%
yeast: 0.8%
salt: 1.8%
oil: 5.5%

********************************************


I baked it in my loaf pan and piped the top with my leftover cocoa buttercream to try to create the mexico bun effect.

Well, apparently NOPE :-)


The bread is quite soft... the crumbs looks close enough to the one I see on Epicurious!

Wednesday, April 22, 2009

a better cream cheese bread


It's almost a year since made this bread. Though it was soft and fluffy, I didn't make it anymore cos I thought it does not keep well.

KWF the forummer who first posted the recipe mentioned that the problem could lie in my cream cheese, rather than the recipe. So I decided to have another go.

Apart from using a different cream cheese, I also added some wholemeal flour. Just a little, so as to retain the soft & fluffy texture.


WHOLEMEAL CREAM CHEESE BREAD

Ingredients :
220g bread flour *
30g wholemeal flour *
10g powder milk
15g sugar
2g salt *
2g dry yeast (1/2 tsp) *
20g butter
50g cream cheese spread *
160g water


Method
  1. Mix all dry ingredients in a large bowl until well blended.

  2. Add in the wet ingredients to form a dough.

  3. Knead dough until dough is elastic and smooth.

  4. Place it in a large greased bowl. Cover the bowl with a damp cloth or cling-wrap and leave it to proof in a warm place till double in size (about 1 hr).

  5. When proofing is completed, punch down the bread dough to release the air.

  6. Divide the dough into 50-60g, and let it rest for 10min. Shape the dough into rounds and place into a 6" pan. Cpver with a cling film & leave to proof until double its size again (about 30-45 minutes).

  7. Bake in preheated oven at 170C for 30 minutes.

  8. Remove bread from loaf pan to cool completely.


* changes that I made to the recipe:
  • Instead of 250g bread flour - I used 220g bread+30g wholemeal to add some nutrient.

  • I used cream cheese spread instead of cream cheese cos that's what I have at home.

  • Since cream cheese spread is very salty, I reduce the salt to 2g (original 3g)

  • I usually have some problem with yeasty smell in bread, so I reduce the amount of yeast slightly.
I made the bread by hand, without stand mixer or breadmaker, using Dan Lepard's method... which save me the tedious kneading. Also, I did not have to add anymore flour to overcome the stickiness. I always follow his methods as far as breadmaking is concern, and have been able to get fairly good & consistent results.

Taste Test:
  • it is truly soft and fluffy, the little wholemeal added some sense of wholesome eating while making it more acceptable for my family who not so keen in eating healthy!

  • I didn't manage to check if the bread turned sour cos I brought the loaf to work and my colleague all wallop all in 30minutes! All of them eat and node their head... you got it?


Just a bit sidetrack to photography, I taken 3 pix of the same bread under different lighting condition. The first pix right on top was taken at night using flash.

This one below is taken at night without flash:


And the final one was taken in the day with natural day light:

While most photographer will say natural lighting is best, but my favourite is actually the night flash one - I find that shows the brown shiny top best!

Monday, April 20, 2009

Waitrose Organic Wholemeal Bread Flour

A close colleague had something to say about my routine bread-making sessions. She reminded me how cheap bread is, at $2+ a wholemeal loaf, she could not comprehend the logic (and economics) of my labourious kneading and time waiting for proofing. Haha, not to mention the utilities bills!


Yeah, she right. So I decide to go "upmarket" with my ingredients - I went out to buy the best flour I can get from supermarket:


The commercial value of Organic Wholemeal Bread is much higher... so I suppose this more than justify my efforts! :-)


****************************

Quick Organic Facts:
Merely using organic flour does not bring it to the organic league. Accordingly, bread is organic when 95 percent of its ingredients come from organic farming and has no added improvers or bulking agents. i.e. Bread Improver, sugar and flavouring are no-no.

Sunday, April 19, 2009

Lemongrass Ginger Tea


If you have been to Aramsa Spa, you must have tried the tea which they served in the lounge. The tea soothes my tired soul so much so that I suspect that's the tea rather than the massage being the reason for me going back again and again.
Once, i even bring my SIGG water bottle there to ta-pao. *Shhh*
On my own, I had been wanting to make some Lemongrass Ginger Pandan Tea for the longest time but never seem to be able to get all the 3 items together. Not sure if it’s jinx or what, I could never get the stars to line up!

Instead of continuing to wait, I just made do with whatever I have:

Simply bruise the lemon grass before adding them into some water and bring to boil. When ready to drink, add sachets of instant ginger tea.

Ummm, the aroma from pandan leaves will complete the whole experience!

Thursday, April 16, 2009

Rapid Light Wholemeal Roll


It could be the middle age weight gain, it could be all the rich and sinful cakes that I have made, it could be the inviting breakfast tables at the hotels.... I have been putting on so much weight that I desperately need to lose some weight before these extras find a permanent home on me.

The easiest (and least sacrificial) step to take is make simple healthier switches, e.g. brown rice vs. white rice, broiled vs. fried, soupy noodle vs. fried noodle. Then of course, bread instead of cake and wholemeal flour instead of white flour.

Wholemeal flour is called wholemeal simply because it is made using the whole wheat grain, including bran and the wheat germ. Since it contains 100% of the wheat grain, including the bran and germ, it has a higher fibre content than plain flour which is a healthier option than white bread.

White bread contains refined carb which take a longer time for your body to break down, plus the fact that wholemeal contains more fibre, gram for gram, you are likely to filled with lesser bread, hence better off for weight management!

Size of dough before 1st proofing


Dough after the first proof - doubled in size.


~*~*~*~*~*~*~*~*~*~*~*~*~*~*~*~*~*~*~*~*

Rapid Light Wholemeal Loaf
Taken from “The Bread Book”, Sara Lewis
Yield a 500g loaf


Strong wholemeal flour 175g
Strong white flour 150g
Caster sugar 2 tsp
Salt ½ tsp
Instant yeast 1 ¾ tsp
Sunflower oil 1 tbsp
Warm water 200ml
Bread Improver 1/2 tsp (optional, not in the original recipe)

  1. mix flours, sugar, salt and yeast in a large bowl. Add oil & gradually mix in enough warm water to make a soft dough.

  2. knead well on a lightly floured surface for 10min until the dough is smooth and elastic. Put into a greased loaf tin

  3. cover loosely with oiled clingfilm and leave in a warm place to rise for 45min or until the dough reaches just above the top of the tin.

  4. remove the clingfilm and bake in a preheated oven 200C for 25min for small loaf.

  5. hold the tin with oven gloves, loosen the bread with a palette knife. Trf to a wire rack to cool.

~*~*~*~*~*~*~*~*~*~*~*~*~*~*~*~*~*~*~*~*


Baker's Notes:

  • the beauty of the recipe is that it requires no knock back and 2nd proofing. But I didn’t read carefully, and did it the traditional way!

  • Forgot to remove it from the loaf pan, bun ended up with wet bottom. Hope you won't make the same error like me. To remedise, I turned the bread upside down and toast it lightly for about 5 min.

  • The bread is soft enough – though you can’t beat the white bread. It could be attributed to the 1/2 tsp of Bread Improver (avail from Phoon Huat) that I have added. Some purist may snarl at the addition of extra chemical to the otherwise healthy bread, I believe if it can entice my family to accept the diet switches, it will be well worth.

  • For shaping, I divided the dough into 60g each. It is not obvious in the picture: I get very full rounded bun for this portion.

  • I added a dope of cream cheese spread as the filling – my parents, though they are non-cheese eater, like the filling!
Some of the filling "leaked" due to the poor shaping.

Wednesday, April 15, 2009

vegan carrot cake

I get to know this recipe thru Halimah in my earlier post. Only now as I am putting up the post that I realised this is the only pic I have:

To be honest, the egged-version is fluffier and more sponge-like. My colleague told me they prefer the "last time one". But for my own consumption, I will stick to the vegan version... this is all about conscious eating.

How about you - what is your favourite carrot cake recipe?

**********************

Macadamia Coconut Carrot Cake
all-purpose flour 1 1/4 cups less 1 tbsp *
baking powder 1 tsp
baking soda ½ teaspoon
salt ½ teaspoon
cinnamon 1 teaspoons
ground nutmeg ½ teaspoon
½ cup mandarin orange juice *
canola oil ¼ cup
sugar ¼ cup
pure maple syrup ¼ cup
vanilla 1 teaspoons
macadamia nuts, roughly chopped ½ cup
unsweetened shredded coconut, 1/4 c
carrots, grated, 1 cup packed and heaped full

INSTRUCTIONS
1. Preheat oven to 350°F (170C) .
2. In a large mixing bowl sift together flour, baking powder, baking soda, salt and ground spices.
3. In a separate large mixing bowl, mix together pineapple, canola oil, sugar, syrup and vanilla. Add the flour mixture to the wet ingredients in batches, combine well with a hand mixer or strong fork. Fold in nuts, coconut and carrots.
4. Divide the batter evenly between cupcake cases and bake for 15 minutes or until the skewer comes out clean when inserted.


My Notes*
  • When using the cup measurement, fluff up the flour in the flour container before scooping into the measuring cup. Otherwise the cake will end up heavier due to higher flour content.

  • original recipe call for pineapple juice, but I do not have. So I use mandarin orange juice. Yep, these are leftovers from CNY. I juice them all and freeze it in the ice cube for subsequent usage. I believe Pineapple will be a better fit cos it has stronger taste to complement the carrots.

  • I get about 10 cupcakes from this halved recipe.

**********************

Monday, April 13, 2009

Sugar-Free Eggless Chocolate Cake


This was made sugarless & eggless for my sister's MIL who is a diabetic patient.

Instead of sugar I use Maltitol Powder:

The advantages of matitol includes
  • fewer calories,

  • does not promote tooth decay and

  • a slow absorption which is important for diabetes.

On the day of delivery, we were aimlessly roaming the shopping mall while waiting for the host, that's when some careless soul bumped my carrier. This is what becomes of the cake:

Fortunately I brought along the chocolate frosting in a piping bag which I was able to do some quick patch up.... but no more 完美!

In anycase, it was great to be part of the celebration - THANKS!


PS:
  • the little round thing on the side are valrhona crunchy pearls, avail at Shermay Cooking School.

  • the tri-coloured choc shavings on the circumference are from Sun Lik.

Saturday, April 11, 2009

The Mini Clearance 4: Matcha Sponge Cake

Finally, the last thing before I hit the sack:


Matcha (Green Tea) Sponge Cake
Adapted from http://angelaphua.multiply.com/photos/album/345


Green tea go exceptionally well with azuki bean like carrot cake with cream cheese frosting by I omitted the azuki bean this bake cos I if I open the canned azuki bean, I am going to leave the balance in the fridge till I get back from the trip.

Ingredients:
(A)
4 eggs
60g sugar (I used 50g)
80g plain flour, sifted
2 ½ tsp matcha, sifted (use 3 tsp or more for a stronger matcha taste)
¾ tbsp cake emulsifier (aka SP or ovalett)
2 tbsp water

(B)
50ml corn oil (I use canola oil)

1) Whisk (A) at high speed untill thick and fluffy (take about 7 mins).
2) Add (B) stir well at low speed.
3) Pour cake batter to a ungreased 8" round pan.
4) Bake in preheat oven at 180C for about 25 mins till cooked. Unmould and transfer to wire rack for cooling.

Verdict:

  • I only used half the recipe (to use up the last 2 eggs) and used a 6” round pan. It turned up to be a very low cake. May be between 1 and 2 centimeters, that’s it.

  • I am still quite helpless when it comes to sponge cake. The basic principle is to beat until ribbon stage (i.e. if you use the whisker to write a figure 8, it will stay visible as you count to 10). For me, the ribbon stage comes as soon as 3min of beating, and it seemed no difference to me at 3rd minute or 7th minute!
  • The sponge cake is quite sturdy – and I plan to use this as a base for all layered cake in future!
  • The cake itself is not sweet with a hint of green tea. The sweetness comes from the creamy frosting.
  • The frosting in the pix looks sloppy rustic cos it was a last minute job. I didn't want the frosting initially but the cake was far too bland... I think I should have sticked to 60g sugar, not forgeting the original recipe already had the sugar content adjusted for the sweetness from azuki beans.

This was my breakfast!
Hurray, I managed to clear out all these in a night!.

  • cooked rice,
  • 3 egg yolks
  • 2 eggs
  • mandarin orange juice
  • spareribs
  • soup premix

The Mini Clearance 3: Mandarin Orange Pudding

This pudding clears out the last bits of the mandarin orange juice in my freezer. Yes, these are the leftovers oranges from CNY. I juiced them before it’s days were up, then freeze it in cubes.

Art of Eating first found the recipe on here. I had to thank her for always so encouraging, and willingness in sharing some great recipes.


----------------------
Mandarin Orange Pudding

Ingredients
(A)
300g milk
100g sugar (i used 80g)
2 ¼ tsp agar-agar powder ( I used konyaku powder)

(B)
300g mandarin orange juice
20g custard powder
2 egg yolk
1tsp orange zest (grated)

(C)
1tbsp butter
few drops of orange food colouring ( I omit this)

Steps:
1. Boil (A) until agar agar powder dissolved.
2. Mix (B) together until well combined.
3. Pour mixture (A) into mixture (B) and stir until well combined.
4. Stir Step no.3 over low fire until mixture thicken.
5. Remove from fire and stir in butter and colouring.
6. Pour into mould and leave to cool.
7. Chill in the fridge, unmould and serve.

----------------------

At first I was sceptical how the jelly going to be like... I never come across a combination of jelly + egg yolk + butter. Anyway I didn’t change anything in the recipe except reducing the sweet factor a wee bit.

Somehow I find the taste a bit strange which I am not able to put a finger on. Maybe the thought of having egg yolk or butter in my jelly.

Taste-wise, it’s very much like Mango pudding less the aroma of mango. Lucky for me, my colleagues who’d tried it said it’s good and they were all finished up in short time. This is another clear proof that I do not have very adventurous taste-bud!

I may try this recipe with mango one day... when the mangoes tree bears me some worthy fruits.

The Mini Clearance 2: Double Boiled Nourishing Soup

I used to make nourishing soups on weekends regularly but ever since I busied with baking, the stock pot had been under-used, and the soup premix over stocked.

I defroze some spareribs to make this nourishing soup. I didn’t take any picture cos the colour of base stock is black like charcoal.

I brought the entire crockerpot to office the next day. The ladies were so happy to have some tonics!


----------------

PS: My mum thinks these premix are overpriced but to me, it's heaven-sent convenience. It saves me so much time to think what to mix with what. Haha, I am not so creative when it comes to soup!

The Mini Clearance 1: Simple Fried Rice

The night before I left for business trip, I foraged the fridge to make sure I clear out all the perishables! Like all you out there, I have an unbelievable amount chucked into the small fridge.

All the subsequent 4 posts were dedicated to the big fridge clearance!!!! All 4 done on a single night!!!

-------------------

Simple Fried Rice


I have several egg yolks sitting around. These were the by-products of macaron play-aroung. I knew if I were to leave these yolks for another week, its gonna be a journey of no return.

I used it to fry the leftovers rice from weekend meals. Add some sausage that I always stock at home. If I had some mixed vegetables this would be almost a meal by itself.

Yo, the egg yolk gives the rice a beautiful yellow, golden hue! (a pity it's not obvious in the pix).

J had this for hs breakfast the next day.

Thursday, April 9, 2009

Wholemeal Hot Cross Bun


Hot Cross Bun has been a long standing tradition of Good Friday. And in my mind, Hot Cross Bun is always related to Christianity until I read it in wikipedia that Greeks may have started to mark the bun earlier.

If you are superstitious you will like the tale that Hot Cross Buns baked on Good Friday never become moldy and they say that you should save one bun as a good luck charm until the next year's buns are made. Yep, I saved it in my stomach *burp*.

I modified my favourite bread recipe to make it with wholemeal flour. The traditional hot cross bun contains mixed spice, cinnamon etc which my highness, Sheen, detest, so I am turning to the tried-and-tested recipe.


Hot Cross Bun
adapted from Eggless Milk Loaf

178g fresh milk
80g brown sugar *
5g salt
100g wholemeal flour
150g bread flour
4g Instant yeast
38g butter (unsalted)
Handful Raisin, plumped up in hot water for an hour **
some veg oil or butter for greasing

How I did it:
  1. Place all the dry ingredients in a mixing bowl and mix well. Make a well in the centre.

  2. Pour the liquid into the well of the dry ingredients. I use a wooden spoon to stir them very quickly just to mix the wet and dry as evenly as possible. Make sure no wet or dry stuff sitting at the bottom of the mixing bowl.

  3. Leave the mixture covered and rest for 10min.

  4. Turn the dough onto a lightly grease work surface. Grease your hand as well to avoid dough from sticking to your hands. Knead for 10-30sec. Stop before the dough absorbs the oil and sticks. Shape the dough into a smooth ball.

  5. Cover the dough with a cloth, and quickly clean the bowl out with warm water (this will keep the dough free from harden bits on the inner surface of the bowl.

  6. Dry and lightly oil the bowl, then lift the dough from work surface and replace it in the bowl. Cover with a cloth and leave for 10 min.

  7. Knead again with greased hands on greased work surface for another 10~30sec. Shape dough and leave it covered for another 10min. Repeat this once more before leaving it to proof in a warm environment until it double in size.

  8. Remove dough and gently punch out the gas. Divide dough into 6 equal portion (~85g each). Roll it out and add raisins, then shape into balls. Let the dough rest and relax for 15 mins. (this 'relaxing' time is needed so that the dough will be easier to roll out and shaped).

  9. Place doughs in lightly greased bread tin/pan, with ~ ½” space between them. Let the doughs proof for the second time. Check for readiness: if you gently press your finger on the dough and it returns to the original shape, it is under-proof. If the dent remains on the dough or taking too long to return to the shape, it is over-proof. The timing is right when the dough slowly bounce back.

  10. Bake at pre-heated oven at 170 deg C for 30 to 35mins.


To make the flour paste to pipe over the bun:

Place 1/4 cup wholemeal flour in a small bowl. Add spoonfuls of water until it reaches the runny consistency. Put the batter into a piping bag (or a plastic bag with corner snipped off) and pipe cross on the bun.


Baker's Notes:

  • * It was a mistake on my part to have used 80g of sugar. I was trying to resize the recipe and somehow the computation went wry... It was certainly too sweet for me, but the kids love it. The sugar content make up for the heavier loave, perhaps. Btew 40-50g will have sufficed.
  • ** I used the water which has been used to plump up the raisin to make flour paste for marking crosses.
  • The cross, on the hindsight, could be better if I'd pipe the royal icing instead. It will be sweet with a gently crunch. If you trying to do the royal icing way, pipe after the bread is baked and cooled.
  • Initially I baked at 180C, but the high sugar content makes it brown very quickly. So I turn down the heat and bake until the it is all through.
  • As for the end results - I know wholemeal bread are meant to be heavier and denser than white bread... but I have a feeling that I did something wrong somewhere. The bread is far too heavy!

Though I have posted the recipe, I won't suggest you bake this if you have a choice. =p

May Peace Prevail on Earth


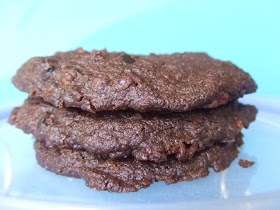
World Peace Cookie, this is the first thing I bake off Dorie Greenspan's "Baking from my home to yours". I enjoyed reading it cos every recipe is prefaced by a short story... I was so engrossed in reading than baking!

Some bloggers have raved how they get an organsm eating these moreish cookie... but it is a clear to me that I do not have a peaceful relationship with them.

With all due respect, these are great cookies. But all that I have been reading from the blog seem more like a soap drama or a slapstick comedy than ensuing peace and happiness!

Anyway, here’s the recipe if you are game want to try for the big O (or to spread the peace gospel):

World Peace Cookie (aka Korova Cookie)
1¼ cups all-purpose flour
1/3 cup unsweetened cocoa powder
½ tsp baking soda
155g unsalted butter, at room temperature
2/3 cup (packed) light brown sugar (I used 1/3 cup)
¼ cup white fine sugar
½ tsp fleur de sel or ¼ tsp fine sea salt (I used ½ tsp fleur del sel) 1 tsp pure vanilla extract
140g bittersweet chocolate, chopped into chips, or a generous ¾ cup mini chocolate chips ( i used 100g cocoa nibs so that I do not need to break a new pack)
  1. Sift the flour, cocoa and baking powder together.

  2. Beat the butter until soft and creamy.

  3. Add both sugars, the salt and vanilla extract and beat for 2 minutes more.

  4. Pour in the dry ingredients and mix just until the flour disappears into the dough- for the best texture, work the dough as little as possible once the flour is added, and don’t be concerned if the dough looks a little crumbly.

  5. Toss in the chocolate/cocoa nibs and mix only to incorporate.

  6. Turn the dough out onto a work surface, gather it together and divide it in half.

  7. Working with one half at a time, shape the dough into logs that are 4cm in diameter. (can use the kitchen roll as a guide to get perfectly rounded log)

  8. Wrap the logs in plastic wrap and refrigerate them for at least 3 hours. (The dough can be refrigerated for up to 3 days or frozen for up to 2 months. If you’ve frozen the dough, you needn’t defrost it before making- bake for 1 minute longer.)

  9. Preheat oven to 160˚C. Line two baking sheets with parchment paper or silicone mats. I use silicon mats cos it is recycleable, and hence a more environmentally responsible choice.

  10. Using a sharp knife, slice the logs into rounds that are 1 cm thick.

  11. Arrange the rounds on the baking sheets, leaving about 3cm between them.

  12. Bake the cookies for 12 minutes- they won’t look done, nor will they be firm, but that’s just the way they should be.

  13. Transfer the baking sheet to a cooling rack and the cookies rest until they are only just warm, at which point you can serve them or let them reach room temperature.

STORING: Packed airtight, the cookies will keep at room temperature for up to 3 days; they can be frozen for up to 2 months.

My Notes:
  • I didn’t do much modification to the recipe; mainly becos it’s already eggless. I only change 2 things:
    - reduce the amount sugar; my old tooth is not taking to sweet stuff these days.
    - Replace the bittersweet chocolate/mini choc chips with cocoa nubs.

  • Talking about cocoa nibs – I can’t remember where I learn about this thing...“Cacao (Cocoa) Nibs are perfectly roasted cocoa beans separated from their husks and broken into small bits. They are the essence of chocolate.”

    The essence of chocolate! That's what got me started excited and was looking for it frantically... I called Shermay Cooking School, Chef Warehouse, Phoon Huat, then finally realises that the humble trusty Sun Lik carries it. It’s $4 per 100g pack, btw. Is it expensive?

    It tastes terribly bitter when eaten raw, but was sooo wonderful when used in choc cookies. It adds crunchiness (somewhat like nuts) and chocolatey without the sweetness! Be forewarn though, not everyone likes the taste. J does cos bitter chocolate is his fave!!!

  • Another thing about this recipe is that the dough is so darn soft. I rolled it into logs and refrigerate to firm up before cutting. You know how difficult to cut them when it was taken out of the fridge? As I cut some pieces break which I just push it back to make rounds. BUT as soon as it goes into the oven , it spreads like nobody’s business... people get pretty slices but I... sigh... how am I to be at peace?

My ugly flatties here...

If J is up for more, I will certainly bake this again. I WANT to get the cylindrical rounds like everyone else!

Stir-fried Mee Tai Bak


It must have been ages since I last had mee tai bak. This is the fat white noodle that many of us used to eat when we are sick. As to why, I have no idea... it seemed like a logical equation; mum automatically cook us mee tai bak when one of us is not well.


I was planning to buy the japanese udon for my weekend meals. Then I saw that the price of udon is actually double of mee tai bak, i naturally opt the economical choice.


I used carrots, japanese mushrooms and some chicken breast to come up with this simple dish. In asian cooking, we are more inclined to "guesstimate";add whatever we fancy and taste, and add some more. Just the way our mum and grandma cooks!

Tuesday, April 7, 2009

Oatmeal Cornflakes Cookie

I am away for business whole of the week... naturally no baking for me BUT this is an opportunity for me to catch up on the posting. I have several bakes which I have been sitting in my folders for weeks!

Like this one – Oatmeal Cornflakes Cookie.

It’s the same yummy Oatmeal Cookie with some lightly crushed cornflakes.
I used the SCS butter which was said to be good by many bakers. And since it’s salted, it’s simple common sense to skip the salt in the recipe but I was dumb enough to add the salt again. The dumber thing is – I didn't realise the mistake I made... until it came out of the oven and I took a bite, and wonder why so salty!!!

Stop grining... C’mon tell me that you have your boo-boo baking moments, don’t you?

Monday, April 6, 2009

Eggless Mocha Cake

These days, I seem to bake nothing else but chocolate cake. Almost every other day, I get requests from friend who do not take eggs or colleagues who cannot have enough of chocolate. I got so bored with baking the same thing day in day out...

When I saw this recipe in Joy of Baking, I tried it out right away.

It is similar to the one I always make; this one here uses less fat, butter as fat, and water instead of buttermilk. One interesting time saver tip says that it can be mixed in the same pan which you are going to bake! That only help if you are baking it in a proper cake pan, and not cupcake!

Another thing to note here is the type of cocoa powder - natural vs. dutch processed. The recipe calls for natual cocoa powder (Hershey is commonly found in our supermarket) which would create chemical reaction with lemon juice to give a red tinge. In addition to the red undertone, it natural cocoa gives a more intense chocolatey flavour. I do not have Hershey at home, and having just bought a kilo-pack valrhona, I do not want to create another SKU in my tiny kitchen. But I would certainly try bake this with Hershey same day!


-----------------------

Mocca Cake:
1 1/2 cups (195 grams) all purpose flour
1 cup (200 grams) granulated white sugar
1/4 cup (25 grams) unsweetened cocoa powder (not Dutch-processed), sifted
1 teaspoon baking powder
1 teaspoon baking soda
1/4 teaspoon salt
1/3 cup (75 grams) unsalted butter, melted
1 cup (240 ml) warm water (I used black expresso to balance out the sweetness)
1 tablespoon lemon juice (or vinegar)
1 teaspoon pure vanilla extract


  1. Preheat oven to 350 degrees F (177 degrees C) and place rack in center of oven.

  2. In an ungreased 8”(20 cm) square cake pan, stir together the flour, sugar, sifted cocoa powder, b.powder, b.soda, and salt.

  3. Add the melted butter, water, lemon juice, and vanilla extract. With a fork, mix all the ingredients together until well blended.

  4. Bake in preheated oven for about 35 minutes, or until the cake springs back when lightly pressed and a toothpick inserted in the center of the cake comes out clean. Remove from oven and place on a wire rack to cool.

My Notes:
  • It takes 18min for my cupcake. But time will vary depending on the size of cupcake case.


Chocolate Frosting:
6 ounces (170 grams) semi-sweet chocolate, chopped
3/4 cup (180 ml) heavy cream (I use President Whipping Cream)
1 tablespoon unsalted butter, room temp


  1. Place the chopped chocolate in a medium sized stainless steel bowl. Heat the cream and butter in a small saucepan over medium heat. Bring just to a boil. Immediately pour the boiling cream over the chocolate and allow to stand for 5 minutes. Stir until smooth. (see notes below)

  2. Let the ganache sit at room temperature until slightly firm (about one hour) and then beat the ganache until creamy smooth and light. With an offset spatula or knife spread the ganache over the cooled cake.


My Notes :
  • What I did was to place the cream into a stainless steel bowl (or any heatproof bowl will do). When the cake is baked and taken out of the oven I put the cream into the oven, using only the balance heat. About 15min later, I put in the chopped chocolate and goes back to the oven again for 5min. By then the cream is warm enough to melt the chocolate.

  • Made frosting with Valrhona Araguani – very strong couverture but personally I find there’s some trace of acidity in the chocolate. Went googled and found this review :

    "Valrhona Grand Cru Araguani is an extraordinary bittersweet couverture chocolate made from a blend of the best Criollo and Trinitario cocoa beans from Venezuela. With a 72% cocoa content, Valrhona's Araguani is perfect for the bittersweet chocolate needs for home pastry chefs and professionals alike - it has a powerfully bitter base with strong liquorice, raisin and chestnut notes and the use of brown sugar has given it notes of dark honey. Araguani also has a higher than typical amount of cocoa butter to give your desserts and truffles a silky mouth finish. It is suitable for pastry, chocolate fillings, molding, enrobing, and icing. The Valrhona "feves" are small oval disks that are easier to work with than large industrial size block. It all started in 1924 a pastry chef from Tournon created a chocolate factory, which eventually achieved a worldwide recognition, and in 1984 became the first to offer a chocolate with 70% cocoa. Valrhona in Tain l'Hermitage is considered by most pastry chefs and chocolatiers as the premier chocolate company in the world. Their focus is solely on their chocolate, and to ensure the highest quality, and optimum flavor, they grow their own cocoa beans, their own cane sugar, and their own vanilla on plantations all around the world - now that's quality control. Valrhona has finally begun to offer its professional products, cocoa and couvertures, packaged for the home pastry enthusiast, a palette of subtle flavors, to create and elaborate delicious chocolate preparations. Araguani is a couverture with 72% cocoa content (with 27% Sugar and 43.5% cocoa butter).

    Source : http://www.amazon.com/Valrhona-Araguani-Dark-Chocolate-ChefShop-com/dp/B000UZT6XC

    Haha, the info didn't help a thing right! Perhaps the less I know, the better I will be.

Anyway, I made everyone in the office so happy with these cuppies:


After seeing all the creations by some fellow bloggers, I resolute to put in as much effort in frosting... afterall we eat with our eye first!


My piping skills are still raw, but I am working on it:


This flower is store-bought:

Using Wilton tip 30 (star):

Using Wilton tip 2C:


In case you are thinking of the taste... well, i marvelled at how the butter made a whole world of difference to the same o'cake. As for the frosting, the creamy ganache has such strong chocolate taste that my colleagues told me it's as good as eating real chocolate.

"Better than those off-the-shelf chocolate", I quipped.

Thursday, April 2, 2009

Eggless Chocolate Bundt Cake

Sheen did well for his chinese spelling yesterday. He proudly told me that he got 100%, sharing the honour with 1 other girl only. For his award, he requested to bake a chocolate cake that night, which I gladly agreed.

While we were mixing, he kept lapping up the batter drips, and told me sheepishly to keep some batter for him.

With a child who loves cake batter, I was more than pleased to have some eggless chocolate cake recipe.


Sheen's little feet in the background:


I finally see what lazy baker I am - I should have changed the cake board to give a cleaner look...


Just abit on the photography. Both pictures are "unphotoshop"; the first one was taken at night, the 2nd one in the morning. The sun rise very early this summer - I took the 2nd picture at 7.45am, and you can see the room already flooded with natural light!

Wednesday, April 1, 2009

Ben 10 Omnitrix

Every boy in this universe must love Ben 10's Omnitrix, the most powerful device in the universe. Sheen got his today:


Sheen shared some with his cousin...

nope... her name is not Gwen :-)
I wish I could mould the fondant omnitrix like Su ... but well, Sheen is excited nonetheless.
Sheen puts it on as soon as class is over. He ever wore it in the class, and got confiscated by this teacher =p
To save time, I used the Wilton cookie icing to do the outline, and the "jelly-like" was piping gel with gel colouring.


All I would say... it's more for the look than for the taste.