Pages

Banner

Sunday, June 29, 2008

Peanut Butter Cupcake


I have a jar of peanut butter that has been sitting on the shelf for some time. It used to be the spread for my son's breakfast but since i pick up baking, I have stopped buying the plain white bread. And he has been happily (I hope) savouring mummy's cupcakes, breads and muffins since!

In order to avert the fate of it landing in the bin, I have been looking for a trusted recipe that I can use up the peanut butter. I found one but the comments from the fellow bakers was not very encouraging sooooo in the end, i baked a plain cupcake and used the peanut butter in the frosting.

RECIPE - Cupcake
1 cup plain flour
1/2 teaspoon baking powder
1/4 teaspoon baking soda
1 cup granulated sugar (I used castor sugar)
1/4 cup butter (~55g)
1/2 teaspoon vanilla essence
2 egg whites
2/3 cup plain yogurt


Directions
1. Preheat the oven to 350° F (180° C). Line 10 muffin cups with foil or paper liners.
2. In a bowl, stir together the flour, baking powder and baking soda. Set aside.
3. In a large mixing bowl with an electric mixer, beat together the sugar, butter and vanilla on high speed for about 2 minutes, or until well mixed. Add the egg whites, one at a time, beating for about a minute after each one. Now add the flour mixture alternately with the yogurt, in about 3 portions each, beating after each addition just until combined, and scraping down the sides to make sure everything is well mixed.
4. Pour batter into the prepared cupcake pan and place in the oven. Bake for 20-25 minutes or until lightly browned on top and a toothpick poked into the middle of a cupcake comes out clean. Let cool completely on a rack.

Source (cupcake): http://www.recipezaar.com/200839


RECIPE - Peanut Butter Frosting
1 tsp cocoa powder
2 tbsp golden syrup
90ml evaporated milk
250g crunchy peanut butter


  1. Heat up the golden syrup if it too thick for handling.
  2. Mix cocoa and peanut butter together and whisk in some milk, a little a time until you get the consistency that you want.
  3. This frosting can be spread over the cupcake while it is still hot.

Taste Test:

  • Personally I find the frosting too rich for my likely.
  • After a day or so, the peanut will lose the crunch.

Wednesday, June 25, 2008

Cranberry Cupcake


Before I pick up baking, I used to order cupcakes from the on-line bakers as I ogled at those pretty photos. Pretty yes, taste... unfortunately most of the times it is...., well, let's just say it looked prettier than it tasted. To be fair to the bakers, there are some really good ones like :
  • the Devil's Chocolate from Cupcake Loft,
  • the Chocolate Ganache from Half Baked Ideas

  • almost everything from CCup
My worst cupcake came from xxxDivinity despite their creative designs! I was thinking why can't people make the cupcake taste as good as it look. Tsk tsk.

Enough rumbles from me, this cranberry cupcake is sooo good, thanks to a recipe posted by Gina at KC. I think all on-line bakers should have tried this before putting theirs up for sale. *GRIN*

Due to the amount of yoghurt in this recipe, the cake is very moist and soft. The sour-ness does not come from the yoghurt but the cranberries. To plump it up, I soak it in hot water for 20min before adding it to the yoghurt.

I used my own home-made yoghurt which is very thick... I should thin it down slightly next time round cos the batter looks very thick. Initially I was worried that the cake would turn out to be too dry but it's nothing short of PERRRFECT!

This cake does not brown so you need to taste for done-ness using the stick or toothpick. If you wait to see it turns brown, the cake would have been over-baked by then, and become too dry.


RECIPE

110g butter, room temperature
140g castor sugar
200g self-raising flour (original call for 200g plain flour + 1 tsp baking powder)
80g dried cranberries
200g plain white yoghurt (not 200ml)
2 eggs, room temperature
1 tsp vanilla essence
1 tbsp melted margarine (for brushing on cupcake tray)

Method:

  1. In a small bowl, add yoghurt and cranberries to mix together. Let it stand for 30 mins (room temperature).
  2. In a large mixer bowl, beat butter and sugar till creamy. (I took 5 min - 3m on low, 2m on med high).
  3. Add eggs, 1 at a time. Mix well
  4. Add vanilla essence to the mixture. Mix well. Turn off mixer.
  5. Add cranberry yoghurt mixture and mix with a spoon till evenly mixed.
  6. Fold in sifted flour/baking powder till well blended.
  7. Brush cupcake tray with melted margarine. Spoon mix into each cup.
  8. Baked in preheated oven 180C for 20 mins till golden brown. Serve warm.

The Legend Water Chalet


Sunset in Port Dickson

From KL, I drove an hour down south to Port Dickson where the refinery is located. I normally put up at the Avillion but this time round I was kindda last minute hence didn't managed to get a room there. So the next alternative is this Hotel called The Legend. The chalets are much like the Avillion except it has a pot-hole in the bathroom such that you can see directly into the sea. Interesting agh.

Apart from the novelty, there ain't much to be excited about cos the water in PD is not like Maldives or Mauritius. Soooo, please don't think you can look down to see fishes or jelly fish! Haha.

Where Bevis is standing is the pot-hole where you can see right into the sea.


Bevis having fun in the water chalet.

Tuesday, June 17, 2008

No-Bake Week!

Work is taking me to KL this week... so I have to take a hiatus from baking this week.

I am putting up Grand Millenium, formerly known as The Regent. A grand but boring hotel... cos there's no interesting baking supplies in the nearby area. I browsed the web and found a list of shops (http://jodelibakery.netfirms.com/resources.htm) but they are not really nearby, you know. And I am not quite ready to brave the chaotic traffic to the other end of the city... I mean not that I have the time anyway! Sigh, I was hoping to have a chance to buy some new baking supplies.

I do not know if it's the shopaholism in me or the baker's instinct; I am constantly looking for reasons to buy something new... all the small cute things like silicon baking cups, cake boxes, mini icing flower or just sprinkles. In fact, my times I find reasons to bake after a long hard day's work just so that I can use my precious gems ;-)

Anyway, I have managed to sneak to Bake-It-Yourself just hours before leaving Singapore to load up some some stuff - the sparkle candles (mum's birthday in August), silver foil cupcake liner (classier than the paper ones), ABC-123 quins (this is soooo unique), Xmas sanding sugar (at 50% off, I can well afford to keep them for xmas), add-a-message fun pix (what a way to personalise my cupcakes!) . Last but not least, a stackable Bear cookie cutter (brand new product from Wilton, so cute... die die must buy lah!).

They are all still in the bag. *GRIN* When I am back, I will unpack them and take a pix for oh-god-sake!

PS (Jun 24): Here's the pix as promised... it's taken with my mobile phone cos my camera has just ka-put!

Friday, June 13, 2008

Brioche


Brioche is a french buttery bread that has a copious amount of butter and egg. So much so that I didn't even manage to knead half the required amount of butter into it cos it was simply too oily. The dough was also very sticky... I heard that this dough had sent some bakers KitchenAid into early retirement... ugh!

Unless you are looking for a reason to buy a new mixer, better to hand mix & knead... Don't say I never warn you!


I knead for about 40min before it comes smooth and elastic. But all the hardwork is worthwhile cos all the kids in the family love it so much... All the bread disappeared in 5 minutes. My niece said it was better than Breadtalk, which is her favourite. Her yi-yi is over the moon lah!

For me, I find bread very soft and fluffy. It will not stick to your teeth like the commercial bread. Recipe is perfect... I just need to brush up my shaping skills to get the pretty smooth brioche!


Brioche RECIPE

75g (3 ounces) butter, slightly softened
1 tsp Instant dry yeast
3 eggs
250g (8 ounces) bread flour
2 tbsp sugar
1/2 tsp salt

  1. Beat eggs lightly with a fork and set aside.
  2. Add all the dry ingredients into a mixing bowl, and mix well.
  3. Make a well in the mixing bowl and add eggs + 2tbsp butter. Stir the mixture until you get a soft dough.
  4. Turn the dough into a light floured surface and knead until smooth and elastic.
  5. Put it back to the bowl (no need to oil) and cover with plastic wrap and let the dough begin to proof for 1 hour or until it double in size.
  6. Turn out dough on a lightly floured surface and knead well, gradually knead in the remaining butter. It will be very greasy... but do not add more flour as it will change the texture of the bread.
  7. Shape dough by make a smooth big ball and place it in a buttered brioche tin (I used the silicon cupcake mould). Then make a small ball and place it on top of the big ball. Use the handle of a spoon to press thru the small ball to the one beneath.
  8. Cover loosely with an oiled cling wrap and leave it to proof for the 2nd time (~20min).
  9. You may glaze with an egg white to produce a nice shine. (I ommitted this step cos I was very tired after all the kneading and shaping)
  10. Muffin sized brioches, like what you see in the pix above) , will take about 10 minutes in a 200C oven. But I plan to lower the oven temperature to 180~190 so that the small ball does not get burnt before the big ball is browned.

Monday, June 9, 2008

Wine Making - Part 2

Round 2:

I have a 2nd go at wine making... having learnt my first lesson, I pray to make good progress this time round. I envisaged the end to end process and made a note of all the equipments that I would need. When in doubt, prepare more than you thought you need.

I cooked the rice as normal and left it to dry for more than half a day. When it is ready to be fermented with the yeast, I wore a rubber glove (also sterilised, heehee) and used 2 spoons to hold the rice and compacting them in the glass container. In the 1st try, the 250g rice was filled to the rim of the horlicks bottle, so this time round, I prepared another container - the porcelain type that chinese used for double-boiled soup.

Today is day 2... and see some water droplets on the top of the glass wall. But it is very very little... not what I expected. But let's see how it goes when I get home to check it out this evening.


------------
Day 3:
Things were looking up at the end of day 2... I saw bubbles at the bottom of the bottle! Anyway I ended up not taking any pic on day 2 cos I learnt from another forummer that she covered her bottles with garbage bag.... I suppose that mean no flash for these little things.

I simply loosen the lid to release the pressure built up in the bottle. I can sniff the aroma of the wine.. I'm jubilant!


------------

Day 4:


But another batch which looked ok on day 1, didn't looks so right today:


Can you see the white specks on top? Specifically at the 8 and 10 o'clock position.
I will be going back to KC to ask for the shi-fu's opinion!
Or anyone here?

Orange Bread


This recipe is created by a talented local blogger (http://pureenjoyment.blogspot.com/2008/03/orange-bread.html)

It was suppose to be very soft and fluffy and taste absolutely orangy. In short, smell and taste like bread dipped in orange juice. I know many bakers have tested this receipe with raves but in my case, something somewhere somehow went wrong thatmy dough was very very dry. Needless to say, the end product turned out to be hard like stone! ~Bin it!~

Pls tell me how yours turn out if you do get down to bake this!

-----------------------------------------

Dry Ingredients
250g bread flour
8g milk powder (1 tbl)
30g sugar
4g salt (1 tsp)
3g yeast (1 & 1/4 tsp)

Wet Ingredients
25g egg (half an egg)
25g magarine
110g freshly squeezed orange juice, unsieved (about 2 mid-size oranges)
1 tbl orange zest (about 1 orange)


Method
  1. Place the dry ingredients into a big bowl and mix well.
  2. Add in the wet ingredients to form a dough.
  3. Knead dough until dough is elastic and smooth.
  4. Place it in a large greased bowl. Cover the bowl with a damp cloth or cling-wrap and leave it to proof in a warm place till double in size (about 1-1.5 hrs). - do note the timing is a mere guide. You need to check the volume of dough... gotta be double in size. How long it takes to reach the stage depends on the weather.
  5. When proofing is completed, punch down the bread dough to release the air.
  6. Divide the dough into 10 equal portions (about 47g per portion).
  7. Shape each portion into a smooth ball and place them into a loaf pan.
  8. Cover the loaf pan with a cling wrap and allow the dough to go for second proofing until double in size again (about 1 hr).
  9. Brush the top with a little magarine and sprinkle some sugar on top.
  10. Bake in preheated oven at 170C for 15-20 minutes. If the top has browned, you can cover the top with an aluminium foil to continue baking.
  11. Remove bread from loaf pan to cool completely.

Eggless Pineapple Tarts


I have amended the title from "vegan" to "eggless"... vegan is one which do not have animal origin but since this lovely tarts calls for a large amount of good quality butter, they do not quality for the "vegan" category :-)

If you have been using egg in your pineapple tart, I really urge you to try this. It is much simplier with lesser ingredients to handle, yet no one is any wiser to know the difference. Trust me. What's more... The pathetically caged-up egg hens in the modern farm will thank you for your decision!

Just for aesthetic reason, I made the tart in paper case and without - you can see that it is much prettier with the cases, ya?

One more thing - this is a melt-in-your-mouth type of pastry. I know some people likes the crunchy type... I like the crumbly soft one in this recipe.

Icing sugar: you can also use castor sugar if you only have this at home. But the finer the sugar, the better it will retain the shape after bake.

Yellow food colouring: Because there's no egg yolk, you may add some colouring to make the dough looks more appetising. I have skipped this to keep it as wholesome as possible.

Shaping the tart: There are 2 types -> open-face and close-face.

  • To make the open-face type, simply roll out the dough on the working top. Use the tart cutter to cut out the dough. Place a ball of pineapple filling on top and press gently to secure the filling to the dough.
  • Divide the dough equally, either by weighing them individually or by the spoon method. I use the latter; measure out the dough in a measuring spoon. I experience different ratio of dough: filling... and personally I prefer 10ml dough to 10 ml filling. Again this is matter of personal preference... you have to try try to find out that you like.
--------------------------------

Ingredients
360 plain flour
50g icing sugar
300g cold unsalted butter
1 tsp vanilla essence

Method

  1. Sift flour and sugar. Mix well.
  2. Add butter to flour. Rub it with your fingers until it resembles bread crumbs. Add vanilla essence and colouring (if using) to form dough.
  3. Chill for an hour.
  4. Shape the pineapple as you desired.
  5. Baked at 190C for 12 min. For my oven, it took 20min.

Peach Muffin


This is actually a metaphor of my Lychee Muffin posted last week. All I did was to replace all-thing Lychee with all-thing Peach.

Go ahead to play with different ingredients!

-------------------------------

Ingredients:
240g self rising flour
1/2 tsp salt
2 eggs, any size
160g fine sugar
260 g canned peach
160ml sunflower oil
8 tbsp peach juice (reserved from the canned peach)

Method:

  1. Cut peach into small pieces. You do not need to cut them very finely cos it will "shrink" after baking. Use the paper towel to pat them dry. Coat them lightly with some flour. This will prevent the fruit from sinking into the bottom during baking.
  2. Mix flour and salt well. Set aside.
  3. Beat the eggs and sugar in a mixer at medium high speed for 3 minute till pale coloured and triple its volume.
  4. Using a spatula (or a large spoon), fold the flour mixture into the egg mixture. Be careful not to burst the tiny air pockets within the beaten egg so as to prevent the muffin becoming too dense and heavy). It's ok for the mixture to be a little lumpy.
  5. Set the mixture aside for 30min to allow it to thicken.
  6. Preheat the oven to 170C.
  7. Fill the muffin cases to 3/4 mark. Add the fruit to the mixture in the muffin case as you scoop.
  8. Bake for 25min till golden brown or when the inserted toothpick comes out clean.

Savoury Pumpkin Cake


The western pumpkin recipe is often high sugar, high caloric food - super unhealthy. Hence I prefer to cook pumpkin our Asian style... You know, pumpkins are 90% water, and they are low in fat, low in calories, loaded with vitamins.

It is a high source of Vitamin A in the form of beta-carotene (an anti-oxidant). Research has shown that beta-carotene-rich foods help lower the incidence of some cancers. Vitamin A also plays a role in good vision, healthy skin, a strong immune system, and bone and teeth development.

Pumpkin is also a good source of Vitamin C which helps to fight infection. Vitamin C is a water soluble nutrient which needs to be replenished in the body, daily.

Pumpkin is high in dietary fiber, which is often lacking in most diets. Fiber is important for proper digestion and elimination. Pumpkin contains about 40 calories per 1 cup serving. I consider it a wholesome health food!
This is site http://nat.crgq.com/ to read up more on the nutrition value of pumpkin.

Unlike carrot cake and yam cake which are easily available in the market, pumpkin cakes are less common in our marketplace. So why not make your own?


RECIPE:


200g rice flour

700ml chicken stock (or water)

1 tsp salt

1 tsp sesame oil

1.5 tbsp vegetable oil

80g dried shrimp, rinsed and coarsely chopped

5 chinese mushroom, soaked and diced

350gm pumpkin

1 tsp white pepper powder

1 tsp sugar

1 tbsp light soy sauce


Method:


  1. Baked the pumpkin for 15min or until it is soft enough to be mashed with a fork.

  2. Mix with 100ml of stock and set aside.

  3. Mix rice flour, stock, salt and sesame oil together and set aside.

  4. Heat up the veg oil in hot wok. Stir fry dried shrimps until fragrant. Add diced mushroom, stir fry for 2-3min.

  5. Add pepper, sugar and soy sauce. Mix well.

  6. Pour in the mashed pumpkin & rice flour mixture. Cook over slow fire until it thickens.

  7. Pour into a mould and level with a spoon. Steam for 30min or till a toothpick comes out clean when inserted into the centre of the mould.

  8. Garnish with sliced chili, spring onion and sesame seed. Serve hot.

This recipe freeze well. You can make extra and freeze the rest. When hungry, just steam again for 5 min before serving.

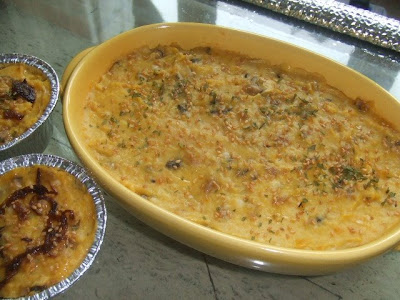
Or you can fill it into individual disposable mould (pix 1) - it makes a simple breakfast pack!

Baking with Kids

I love to involve my little one in my baking. Ok I'll be honest, that's becos I do not have a helper and this is the only way I can get thru a baking session! Having said that there are many good reasons why you should cook with your kids.


  1. Cooking is a life skill and teaching them early will help instill skills to last them a lifetime. This is important when they are on their own and won't have to rely on fast food and junk food.
    In my case, I hope this value added skills will help me have a better daughter-in-law.

  2. Kids love to do things themselves and being able to cook their own meals will help to build his self confidence. Trust me, it's a great deal to them as they accomplish a task!

  3. Kids love to eat what they cook. This is the easiest way to get them to eat more and eat healthy.

  4. Cooking together teach them teamwork. E.g. he knows he needs to ask for help to take stuff out of the hot oven.

More importantly, it create family time and bonding. I am sure these are fond memories that will stay with them. It may take a longer time to get thru the session with a kid but the moments with your children will be priceless. Before you go have a cooking session with your child, just bear in mind to have LOTS of patience. Remember never to lose your cool when there's spilled
stuff all over the place - I know it is easier said than done :-)


I chose this Vegan Chocolate Cake to bake with my 3-year-old. Well, it has to be simple cos a child of that age hasn't got much attention span to start with. With that in mind, you just need to pick a brainless recipe that does not need more instruction than his little fingers can count. *GRIN*

------------------------------------------------

RECIPE

1.5 cup all purpose flour
1 cup sugar
1 tsp baking soda (also called bicarbonate of soda)
1 tsp salt
0.5 cup cocoa powder
1 cup of coffee (or water/milk/buttermilk, I used coffee for a more flavoursome cake)
0.5 cup vegetable oil (I like grape seed oil... a healthier choice)
1 tsp vinegar
1 tsp vanilla essence (optional, I added for the aroma)
White chocolate chips (optional)

Method:


  1. Preheat oven to 180C.

  2. Mix all of the ingredients (except choc chips) well with a electric mixer or a wooden spoon until it is smooth. The batter must be free of lump.

  3. Stir in choc chips if you are using.

  4. Fill the muffin case to 80% full.

  5. Bake at the middle rack for 25min or until the toothpick comes out clean when inserted.

Yield 15 cupcake or 8" round cake.

Results:


  1. It rises to a beautiful dome without spilling to the sides. In future I will fill it all the way.

  2. Anyway, if your cake also turn out to have a high dome with cracks in the middle (see my 1st pix) - then probably the oven is too hot. I am an engineer and always like to explain things with science so please bear with me... The surface of the cake cooked very quickly, while the inside remained uncooked and unrisen. Next, the inside of the cake rose as it cooked and pushed up the already-cooked surface of the cake, causing the cake to dome and crack. To remedise this, just lower the temperature by 10C and bake for additional 5 min. And/or, add a small (oven-proof) bowl of water in the oven - the steam will moisten the surface of the cake so that it is not likely to crack as the centre of the cake rises. Having said this, do note that every oven is different; 180C maybe too hot for me, but could be jolly well be the right setting for you. So you need to test out the recipe and make your personal notes for future reference.
  3. The first time I reduced the sugar to 2/3 cup but I think 1 cup sugar taste better. If you still find it not sweet enough, you can add the chocolate frosting (which I did)
  4. It is moist and soft like the usual cake. In all fairness, you can't compare to the usual cake made with eggs but this is a great alternative when you run out of eggs. In fact this recipe originated from the depression era when eggs were short in supply.
  5. I find the sourish raspberry balances the richness & sweetness of chocolate very well. But you are free to experiment with any fruit that you desire. Go ahead, this is where you can get adventurous!


Chocolate Frosting
2 oz baking chocolate (unsweetened, semi-sweet etc)

whipping cream

icing sugar

  • Melt the chocolate in microwave or over a pot of hot water.
  • Mix with whipping cream & icing sugar until smooth.
  • Add 1 tbsp a time (1 tbsp cream + 1 tbsp sugar) until you get the consistency and sweetness that you want.

Thursday, June 5, 2008

Wine Making - Part 1

I have not been posting very much these days cos I am exploring a new area - wine-making.

I am a Hockchia, a variation of Hokkien, similar to Hockchiew. It's a huge community in Sitiawan, PERAK and one of the signature dish is Hong Chao chicken with mee suah.

Hong Chao is a by-product of red wine, which is fermented with glutinous rice, wine biscuit and red rice bran (also known as red yeast). It typically contains a ~13-15% alcohol content. The commercial Hong Chao often has a sourish taste, which is a sign of poor quality. My sis, who also loves Hong Chao and anything that's cooked with red wine, had been craving for good supply (her in laws commented that rice wine is expensive!)

And I finally set down to do it last weekend when my mum surprisingly told me she has the "stuff" to make rice wine. I google and researched for all the pointers and got going.
Stuff to make wine... Wine Biscuit &
Wine yeast

Today, I was so sad to find out that on the 2nd day of fermentation, the top of the wine starts to get moldy. This shows that the wine-making has failed and must be thrown away to avoid wine poisoning.

BUT I am not giving up... I am going to have a 2nd go, 3rd go... until I succeed!

RECIPE

250g Glutinous rice
30 g red yeast, powdered
1/4 wine biscuit, powdered


  1. Cooked the rice in rice cooker as you normally would. No need pre-soaking.

  2. Cool the rice completely until it is cold and dry. – IMPORTANT.

  3. Put one layer of rice in the bottle, sprinkle with red yeast then chow paeng. Continue until finish. press the rice down to compact it.

  4. Tighten the lid and put in cool, dry place.


Day 1 - you will see a bit of wine and lots of water droplets at the top of the jar just above the rice.
Day 3 - Check to see bubbles forming at the bottom of the pot.
If white mould on the top of the rice, THROW away – this means the wine-making failed.


Stir well after one week. The red wine should be ready in about 1 1/2 month. Strain using cheese cloth.

The wine is good for cooking. The residue will be Hong Chao. Add salt to the residue and keep in fridge.

If its acidic, means its left out too long for fermentation. Once it reaches 1 month, keep it in the fridge to stop the fermentation.


Reflections on the 1st failure:


The number 1 reason for successful wine making is hygience and sterilisation. All utensils, equipment and anything that comes in contact with the wine, has to be sanitized. This includes even small items which might be overlooked, such as spoons and your hands, and under finger nails.


Not that I do not know this... I mean, I washed, scrubbed & sanitized my hands with the alcohol. But when the rice sticks to your hands like superglue, it's not dropping into the container... no enough shaking or poking can get them off your hands, you start to panic and reach for other utensils that will help. Sigh, that's when all efforts go down the drain!


By the way, though I share the several effective methods of sterilization.


  1. Boiling water. The water must be poured over the ingredients or equipment whilst it's boiling or it won't work effectively. DO NOT pour boiling water over or into cool glass or it will inevitably break.

  2. Household bleach solution. A very effective sterilizing agent is household bleach, diluted at the rate of one cupful to a gallon (4 litres) of water. This solution is ideal for sterilizing plastic and glass equipment only. Jars and bottles can be filled to the neck, while smaller pieces of equipment can be placed in a bucket containing the solution. In both cases, leaving the equipment overnight should ensure it is thoroughly sterilized. Be sure to rinse everything before you start, though, as any traces of bleach will certainly spoil the wine. The bleach solution can be used several times. If you decide to use this method of sterilization, do remember that bleach can be dangerous, so keep it off your hands and, above all, don't leave it where children can get at it.

  3. Sterilisation Tablet. Products which are designed for sterilizing babies' feeding equipment are very suitable for use with winemaking equipment. Follow the instructions on the bottle or packet.

Fermenting equipment should be well drained, or rinsed with sterile (i.e. boiled and cooled) water before use. Otherwise the traces of sulphite may inhibit the wine yeast, and if that happens, a hydrogen sulphide (bad egg) smell may develop. Similarly, if the sulphite used for sterilizing equipment gets into a finished wine, it may spoil the color, so rinse out any jars and bottles before you use them.


So much for now... as and when I learn something new, I will update here!


Til then, good luck to me!

Sunday, June 1, 2008

Lychee Muffin


The recipe was adapted from Oi Lin's cookbook "Delicious Asian Baked Treats". She is one of the most enterprising homegrown baker. You can visit her videoblog (http://www.pineapple-tarts.blogspot.com/) to "see" the steps in baking. She really make baking seem so effortless. I hope you can also show your support by buying her cookbook.


I have made some changes to the original recipe. For the original recipe, pls refer to her cookbook.


Ingredients:

240g self rising flour

1/2 tsp salt

2 eggs, any size

160g fine sugar

260 g canned lychee

160ml sunflower oil

2 tbsp lychee essence

8 tbsp lychee juice (reserved from the canned lychee)


Method:

1. Cut lychee into small pieces. You do not need to cut them very finely cos it will "shrink" after baking. Use the paper towel to pat them dry. Coat them lightly with some flour. This will prevent the lychee from sinking into the bottom during baking.

2. Mix flour and salt well. Set aside.

3. Beat the eggs and sugar in a mixer at medium high speed for 3 minute till pale coloured and triple its volume.

4. Using a spatula (or a large spoon), fold the flour mixture into the egg mixture. Be careful not to burst the tiny air pockets within the beaten egg so as to prevent the muffin becoming too dense and heavy). It's ok for the mixture to be a little lumpy.

5. Set the mixture aside for 30min to allow it to thicken.

6. Preheat the oven to 170C.

7. Fill the muffin cases to 3/4 mark. Add the lychee to the mixture in the muffin case as you scoop.

8. Bake for 25min till golden brown or when the inserted toothpick comes out clean.


The results:


  • The muffin is as lusciously moist and frangrant as described in Oi Lin's cookbook. What a nice change from the usual muffin flavor!

  • The texture is more cupcake-like to me, rather than muffin. You can also make this into cupcake; you can frost the flat-top.

  • The first time when I baked, I followed the instruction and fill it up all the way - that didn't work cos I ended up with over flowing muffin which is not a very pretty sight.