Pages

Banner

Friday, October 31, 2008

Digital Fun


A friend whom I get to know at company's "Women's Career Development Workshop" asks me for a cutest photo of my son. Not that this photo is cute, but is sitting conveniently on My Desktop. No need to rummage in the many labybrith folders that I have created over the years! Haha.
A few hours later, she sent me back these interesting pictures:


Interesting agh!

Thursday, October 30, 2008

Hell of a Halloween Time


Tired of all things Halloween? Bear with me, this is my last post to the run up of the eve of Halloween!

I baked these cookie using the Chocolate Cookie recipe by Toba Garrett, "Creative Cookie". Toba Garrett is one of those wonderful Manhatten pastry chefs whose cakes and cookies are well sought by the rich and famous. Well, who else could afford to pay US$15 for a 3" monogram cookie?

ME? No thanks, I will take the book.

I first saw this recipe in the book but took no heed until my gregarious course mate Freda raved about the recipe she got in the previous class. So when I received her email, I went "orhhhh..." Next, I got down to make the dough. She told me she refrigerate it overnight so that the cookie will maintain it's shape better - Thanks pal, it did as you could see from my cookies.


I used to think that the baking powder or soda will distort the cookie but went ahead to add it. A leap of faith, you can say. I wasn't disappointed. The cookie turned out well. Another advice Freda gave was to add choc chips - surprise for the kids. Hers loved it, and well, you see Bevis did!


Chocolate Cookie
1 c (230g) unsalted butter
2/3 c (150g) granulated sugar - I used 1/3 cup
1/3 c (75g) dark brown sugar, packed
1 large egg
1 tbsp extra strong coffee or 1 tbsp choc liqueur - I used Kahlua
1/3 c (35g) dutch processed cocoa powder
3 c (336g) ap flour
½ tsp baking soda
¼ tsp salt

  1. Cream the butter and sugar together, add the egg and vanilla and blend well.

  2. Add the powdered ingredients and blend into the butter mixture a bit at a time, blending well after each addition.

  3. Divide the finished dough into two balls, and wrap one ball in plastic until ready to use.

  4. Roll out the other ball on a floured surface to 1/4 inch. Cut out cookies using a knife or cookie cutter and remove cookies with a spatula to an ungreased, non-stick cookie sheet.

  5. Bake for 8 to 10 minutes, taking care not to let the cookies brown. Jezzzz, i was stunned by this, the cookie IS brown!
Although the original recipe calls for use of a mixer, I made the dough by hand with a wooden spoon and was easy. As I mixed dough, I was caught eating the dough. Really aromatic and I bet you would be chomping away too! So pls stop that smirk now... *pout*


Royal Icing
500g confectioner's sugar
3 tablespoons of powdered egg white
5-6 tbsp of warm water

  1. Beat them together, adding water very slowly, tablespoon by tablespoon until you have a fairly thick, pipable icing.
  2. Divide the white icing into separate smaller bowls before adding colour paste. Pls check that you had the icing colours. The last round, I unknowningly bought the candy colours and was wondering why my icing melted to be unpipe-able. It was flowing out of my tip2 even without any pressure. Only much later that I realised that the candy colour is oil-based, which will break down the royal icing. Well, another lesson learnt!
  3. Fit a pastry bag with a #3 tip, fill with the icing and have a little fun.

My plain dark Bat - work in progress:


A simple outline adds some liveliness:


Pumpkin. J said the H'ween pumpkin should have a evil face... I will do it next round.


Ghost. Bevis' avourite cos he could use his edible food marker to scribble his name on the cookie. This is like his canvas, when done, he'll eat up the mess.

Additional Icing Tips:

  • When mixing the colours, pls make sure you mix enough icing for your cookie cos it would be very difficult to achieve the same colour subsequently.
  • Also, cover your icing with an airtight lid when not in use. Remember it dries up fast!

Tuesday, October 28, 2008

My Wilton Cookie Kit

Following the earlier post of my new finds... here's this is my finished product:


I went down to the B-I-Y on a thursday evening cos I wanted to get 1 more set for my nieces to play play on weekend since their exams were just over. Becos of the jam I was there 7 sharp... sadly the store is closed liao.


Bye bye Toy!

Sunday, October 26, 2008

Nov S&SB - Spooktacular Halloween Cupcakes

Sweet and Simple Bakes: Spooktacular - Halloween - Cupcakes


Halloween is little celebrated in Singapore... Common folks like us do not dress our kids up or make anything spooky stuff on Oct 31st, the day when "the living and the dead would mingle together on earth", as quoted from Sweet and Simple Bake.

If you are in Singapore, and want to feel the festivities, go to Woodgrove in Woodlands. This is our "Little America". Haha, how amazing this label "Little American" has enhanced the value of the property prices around the vicinity unlike Little India, Serangoon or Little Thai, Beach Road!!!???.

Well, I digress. Sorry. Now, may I humbly presenting my Halloween Cupcake Collection:


This pumpkin is the easiest to make:


  1. Just slap on the green buttercream, and create wavey effect with the spatula using the up down motion.

  2. Insert the smiling pumpkin fun pix which comes with the Wilton H'ween cupcake liner pack.

  3. Sprinkle quinns.

  4. Done.


These ghosts and skeletons (below) are made from large and mini marshmellow, which I learn from Martha Stewart.


This is the other box that I am packing up to give away to my friend, D, a poor soul who had to pay for an expensive dinner in exchange for the miserable 4 cuppies:


D, any good?

Friday, October 24, 2008

Sweet Sandwich Bread (S&D Method)


I love making cupcakes but have taken to baking bread recently cos I just cleaned out my fridge last week and was throwing away several boxes of the cupcakes which I had frozen earlier. The intent was to keep them to eat later but the supply outstrip consumption in my family so in the end I had to toss them out. Very sad... cos there's alot of time and effort has being put into each little cuppies.

But bread is different. Hubby eats bread, so statistically there's a 100% increase in demand, making it easier to "sell".

To further entice their appetite, I have to make them into different flavour... You won't eat 3 pork floss bun, but will eat 1 pork floss, 1 hot dog and 1 kaya. The more variation, the faster it gets eaten up. Heehee, little tricks to get these people to eat more!

This time round I made :
1) Peanut Butter Loave


It was meant to be a loave, but didnt rise high enough as you can see! Also I do not have a bread loaf tin so I just use my loaf cake pan for it. Next time I will use 120g (x3 pcs) and let it proof longer. I may get a square loaf... let's see.


I spread a thin delay of crunch peanut butter before rolling it up like swiss-roll.

2) Corn - this is my favourite... a healthier choice!


To get this shape, flatten the dough, sprinkle the corn on it (more or less as you wish) then roll it up. Make it length-wise, and coil it in the little cuppies.


The effect of glazing: the one on the right is without glazing:

I made the glaze using 1 tbsp of milk powder with some water. Brush it on when the bun is hot.

3) Pork floss


Mix the pork floss with some condense milk before wrapping it into the dough. I do not have condense milk so I use cream cheese spread.

4) Sausage
I roll the 50g dough into long strip, then wrap it round the sausage. Tuck the ends underneath so that it does not come loose.


Kaya

I have been making bun with kaya filling with little luck. On several instances, the kaya would just find it's way out of the dough, making the oven so stickly and hard to clean! It must be the way I wrap - if you know if a better way to do this, pls share with me.

*~*~*~*~*~*~*~*~*~*~*~*~*~*~*~*~*~*~*~*~*~

This recipe is taken from Alex Goh, “Baking Code”, P140
Makes 2 loaves.

Overnight Sponge:
100g bread flour
60g water, room temp
¼ tsp instant yeast


  1. Mix the instant yeast with 20g of water until well blended. Add in the remaining ingredients and knead to form a dough.

  2. Let it proof for 30min. Wrap with cling film and keep in the refridgerator overnight or upto 48hours.


This is my sponge - I get 152g of overnight sponge from the recipe.


Dough:
Ingredient A -
550g bread flour
80g sugar
6g salt
20g milk powder
10g instant yeast

Ingredient B -
150g overnight sponge

Ingredient C -
1 cold egg
270g cold water

Ingredient D -
75g butter

Method:

  1. Mix A until well blended. Add B, then C, knead to form a dough.

  2. Add in D, knead to form a smooth and elastic dough. Cover it with cling film. Allow it to proof for 45 min.

  3. Divide the dough into 6 equal portions, mould it round. Allow it to rest for 10min.

  4. Roll the dough flat, then roll it up like swiss-roll. Allow it to rest for 10min. Repeat the step 1 more time.

  5. Place 3 pieces of the dough into a greased loaf tin (20x 11.5x 11.5cm).
    Let it proof for 50min or until 80% full of the loaf tin. Cover it with the lid.

  6. Bake at 200C for 35min. Remove it immediately from the tin when baked.

This recipe has an egg - it adds a very nice yellow tinge to the bread. Also the leavening effect of the egg makes the bread soft and fluffy!

Thursday, October 23, 2008

Victoria Sponge

My first taste of Victoria Sponge was in my former company - an expat colleague baked a whole cake for me cos, over a casual meal, I mentioned I never tasted one before.

That was the very first time anyone had commissioned a cake in my honor :-)

We had some special friendship... I recalled once he lent his company car to me when he went back to London for 1-month home leave, for obvious reason to put it to better use. But I naively drove to work. This simple but brainless act raised some eyebrowns and was very quickly escalated to the HR. I couldn't care less about what was said or rumoured, all I knew my poor colleague was asked to explain on his return...=p

Back to the sponge. Right after I left the company, I never had a chance to eat Victoria Sponge anymore. One, I had not come across one in a local confectionary. Two, I can't bake then.


I was elated to find this recipe in Aunty Yochana's site. That brought back some memories, and I decided to bake it right away!


Yep, I have made this into cupcakes cos it is easier to share around.

Also, with Halloween round the corner, i am using the H'ween cupcake liner to add the festivity, and to prepare for my S&SB.


Victoria Sponge is not complete without the raspberry filling. I filled it with tip 230 using the filling method here .


Then cover the hole with a pumpkin quinn. =p

*~*~*~*~*~*~*~*~*~*~*~*~*~*~*~*~*~*~*~*~*~

Ingredients:
180 gm. Butter
160 gm. sugar
3 nos. eggs
30 gm. milk
30 gm. dairy whip cream
1 tsp. vanilla essence
180 gm. Self raising flour
finely grated 1 lemon zest
60 gm. raspberry or strawberry jam
snow powder or icing sugar to sprinkle

Method:
(1) Cream butter and sugar until creamy and fluffy.
(2) Slowly add in beaten eggs, fresh milk and whip cream. Add in 1 Tbsp. flour if the mixture cuddles. Add in lemon zest.
(3) Add in flour and mix thoroughly.
(4) Pour into 2 nos. 8" round trays and bake at 175C for about 40 mins or till cooked.
(5) Remove tins from oven and set aside for 5 mins before removing from the tin.
(6) Let it cool, spread the jam on one of the cake and top up with the other piece of cake.
(7) Sprinkle snow powder on top and serve.

Some notes on this bake:

  • If the batter cuddles, you will lose some air... to avoid this, make sure all your ingredients are brought out from the fridge well in advance. They should be at room temperature for an ideal bake.

  • I do not have lemon at home, so I replace with orange zest which adds some tangy-ness.

  • When baking into cupcake, the baking time is reduce to 25min. Check your oven 5min before and after for doneness. Over-baking will yield dry cake.

  • Icing powder melts easily in our climate. Try to use snow powder. Else, only powder the icing over the cake just before serving.

  • This batter will spread and level out itself when in the oven.

On the side note, i almost got a scare when i see the Chinese text on my whipping cream:

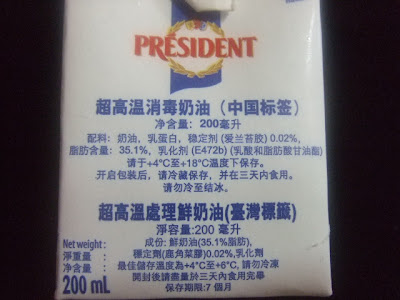
Haha, false alarm... it is made in France:
Well, better err on the safe side.

Before I part, let's pray for the victims of tainted milk in China... my heart goes out to them!

Wednesday, October 22, 2008

123 Chocolate Cup


I got the idea from Art of Eating. - instead of oreo, I have Coco Pops sitting at home.


Here's the recipe in the same simplicity:-)


*~*~*~*~*~*~*~*~*~*~*~*~*~*~*~*~*~*~*~*~*~

123 Chocolate Cup
Ingredients:
  • Cocoa Pops

  • Chocolate, melted with 1 tbsp of crisco.

Method:

  1. Put some coco pops in the mini aluminium cup.

  2. Fill up the cup with melted chocolate.

  3. Cool, then chomp!

*~*~*~*~*~*~*~*~*~*~*~*~*~*~*~*~*~*~*~*~*~

I named this 123 choc cup cos it is so simple yet so pretty! The more simple the recipe, the more important is it to have quality ingredients... As a chocoholic, I will not use anything less than the Valrhona :-)


Tuesday, October 21, 2008

Halloween Cookie House Kit


I first saw this prebaked halloween cookie house kit in Wilton's site... and was so excited that i started to search for local store carrying this. For US13.99, I was expecting to pay ~$22 in Singapore... you can imagine my jaws dropping when I saw this in B-I-Y for S$36!


Also I was a little disappointed when the store assistant didn't allow me to open up the pack to check if the cookie are in good condition. I supposed with the price I had to fork out, it was a fair request. In the end, I had to buy first, then open up on the spot to check the contents. If it broken or cracked, then I use the credit amount to buy something else. No cash refund! I guess this is the part where retail industry in Singapore has to improve on. In some countries, consumers are entitled to full refund for anything that didn;t meet their expectation =p


Fortunately it was all in good condition - the smart chaps in Wilton shrink-wrapped the cookie with a cardboard backing to withstand all the mishandlings. I was quite happy with my find, it has everything I need for the decoration:


- 10 pre-baked gingerbread house pieces
- orange and black decorating icing mixes,
- 1 ghost icing decoration,
- colorful candy (purple and orange mini round candies, jelly beans and candy corn),
- 2 decorating tips,
- 2 disposable decorating bags,
- cardboard base, complete assembly and decorating instructions.


I will post the pix after I get them assembled with my little boy.


If you care to make everything from scratch: here's where you can find the instruction:
http://www.bettycrocker.com/recipes/recipe.aspx?recipeID=34107&Source=SearchResultPage

Me? I am pure lazy!