Pages

Banner

Showing posts with label All Recipe - Cookies. Show all posts

Monday, February 11, 2013

Eggless Pineapple Tarts - new recipe

I make pineapple tarts every year.  This year, I saw it from Facebook that many of my friends also decided to make their own pineapple tarts.  Ha, I am just glad that I have a good 5 years head start!!!
 
What's more?  This year, I decided to be a good girl and grate my pineapple instead of leaving them to spine endlessly in the electric blender.


See how fibrous the grated pineapple are!


When I attended the formal baking lesson, the chef actually use the same jam for both open and close tarts.  But I always feel that they should be different:  the jam  for closed tart should be drier or else the dough will crack while the dry jam will be harden on the open tarts. 

So I made 2 different type of jam:


For the dough, i use the interesting recipe from Kitchen Tigress (whom, btw, has much a wonderful blog!).  After using the creaming method and rub-in method, I am only too excited to test-drive the boiling method!

KT was kind enough to advice that this recipe is only suitable for close tarts as "it is very delicate and crumbly", and the pattern made mould was indeed puff-up in the oven and all I got was a fat characterless blob.   But I really wanted to keep this buttery pastry for my sister who has a penchant for both all-things-buttery and open tarts.  Stubborn.  My problem lah.

To cut the long story short, I had a fun time playing with the dough, and after using up 1 kg of Elle Vire butter (yes, I am a slow learner as far as baking is concern =p), I figured out the trick to make it more pliable for open tarts and retain its form after baking.  You wanna know...  c'mon, send me some Elle Vire!


 Swee boh?


Just as KT put it - 101% buttery and melt-in-your-mouth!
 
--------------------------------------------------------------------------------------------------------------------------

RECIPE - Pastry for Pineapple Tarts
(from David Lebovitz via Kitchen Tigress)

360 g unsalted butter
60 ml vegetable oil
75 ml water
60 g sugar
½ tsp salt
600 g plain flour

1. Put all ingredients except flour in a pot. Over high heat, bring to a boil. Continue boiling till foam subsides and colour darkens.  Alternatively, weigh pot and contents before heating, then boil till weight is reduced by about 65 g.

2. Turn off heat. Tip flour into pot. Mix thoroughly and leave till just cool enough to handle. Knead to make sure mixing is even, adjusting with 1-2 tbsp water if mixture is crumbly, or 1-2 tsp plain flour if sticky. Use a cookie scoop to divide the dough into equal parts.


Thursday, May 27, 2010

Happy Birthday J!


J does not like cake. He finds the cream more "yucks" then "yum", so this birthday I thought a birthday cookie will delight him.

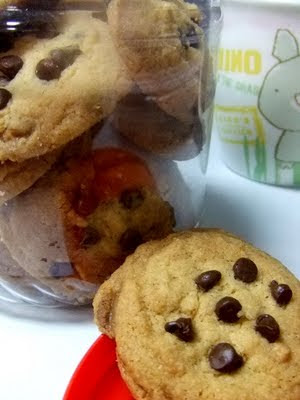
I used the usual chocolate chip recipe, and baked it in the Pooh mold. Nutella is used to paint the eyebrown etc... really simpler and faster than baking a cake which will not be appreciated after all. :-)


This celebration means alot to us - I am grateful to him for putting his career on hold so that I can fulfil my dream to live in a the angmoh city! I am not good in saying anything mushy... just want to borrow this part from my fav drama "Down with Love" :

"...能够遇见你认识你喜欢你爱上你
感谢我每滴眼泪... "


---------------------
Will post the recipe shortly; am having problem with my word document now :-(


------------------------

Updated 30/8 with recipe:

Modified from here :

Chocolate Chunk Cookie

2 cups (260 grams) all purpose flour
1 1/4 teaspoons baking soda
1/4 teaspoon salt
3/4 cup (170 grams) unsalted butter, room temperature
1/2 cup granulated white sugar
1/4 cup packed light brown sugar
2 teaspoons pure vanilla extract
1 1/4 cups (210 grams) chocolate chips

  1. Preheat oven to 350 degrees F (177 degrees C). Place one oven rack in the top third of the oven, and one oven rack in the bottom third of the oven. Line two baking sheets with parchment paper.
  2. In a large bowl, whisk together the flour, baking soda, and salt.
  3. In the bowl of your electric mixer, cream the butter and sugars until light and fluffy (about 2 - 3 minutes). Scrape down the sides of the bowl. Beat in the vanilla extract.
  4. Gradually add the flour mixture to the creamed mixture and beat just until incorporated. Scrape down the sides of the bowl as needed. Stir in the chocolate chips.
  5. Roll the dough into about 1/4" thick. Press the mould over the dough, and remove the excess. ALternatively, put some dough inside the mould, and use a spoon to flatten out the dough, and fill up all the edges.
  6. Bake the cookies for about 15-17 minutes, rotating the baking sheets halfway through the baking time.
  7. The cookies are done when they are light golden brown in color and just set. They will still seem a little soft but they will firm up as they cool. Remove from oven and let the cookies cool a few minutes on the baking sheet before transferring them to a wire rack to cool.

Thursday, April 1, 2010

Nigella’s Totally Chocolate Chocolate Chips

(pix from Nigella Lawson)


This recipe comes from an author whom I really like in my early days of baking. These days, I rather look at her less cos I was afraid I will soon end up with her generous size one day!


Well, I think it is difficult for anyone to resist piling on weight if you have a fantastic cookie recipe like this one here. It is so rich that you may think you are eating chocolate! Of course this is what you get when you have almost half a kilo of chocolate in a 150g-flour cookie dough!


These cookie are pretty awesome if you are chocoholic... it is so intense, you can't stop at one. Just good for me, but some of my colleague think it is chocolate overload for them.


Nigella’s Totally Chocolate Chocolate Chips

125g dark chocolate, minimum 70% cocoa solids
150g plain flour
30g cocoa, sieved
1 teaspoon bicarbonate of soda
½ teaspoon salt
125g soft butter
75g light brown sugar
50g white sugar
1 teaspoon vanilla extract
1 egg, cold from the fridge - I omit this
350g semi-sweet chocolate chips


  1. Preheat the oven to 170’C. Melt the 125g dark chocolate either in the microwave or in a heatproof dish over a pan of simmering water.


  2. Put the flour, cocoa, bicarbonate of soda and salt into a bowl.


  3. Cream the butter and sugars in another bowl. Add the melted chocolate and mix together.


  4. Beat in the vanilla extract and cold egg (if you are using), and then mix in the dry ingrdients. Finally stir in the chocolate morsels or chips.


  5. Scoop out 12 equal-sized mounds – an ice cream scoop and a palette knife are the best tools for the job – and place on a lined baking sheet about 6cm apart. Do not flatten them.


  6. Cook for 18 minutes, testing with a cake tester to make sure it comes out semi-clean and not wet with cake batter. If you pierce a chocolate chip, try again.


  7. Leave to cool slightly on the baking sheet for 4 -5 minutes, then transfer them to a cooling rack to harden as they cool.

-------------------
Notes:
I did not reduce the amount of sugar in this recipe cos the chocolate I used is unsweetened & is very very bitter.

Saturday, February 20, 2010

Delicious Cream Cheese Cookies


I took Sheen to school last Friday as daddy is away. Sheen is always happy when mum drives cos that means he can take the front seat (with his car seat of course).


We happily set off. Enjoyed a short 15min ride in the car. Reached. Off the engine and walked to the car boot to take his school bag. *SCREAM* agh, I didn't bring his bag!!!

*Tear my hair*
---------------------

I promised Sheen a baking session for the boo-boo. And since I have some leftover cream cheese from the last cookie ; this is just the one! The original recipe requires an egg yolk but that means I have to store the balance egg white... In the end, I decided to omit the egg yolk altogether. The version is after my mod.


Delicious Cream Cheese Cookies (Eggless Cut out cookie)
Adapted from Aunty Yochana
150 gm. Butter
80 gm. cream cheese, room temperature
100 gm. castor sugar
1 tsp. vanilla extract
200 gm. plain flour
80 gm. cornflour
½ tsp. baking powder

Method:

  1. Cream butter, sugar and cream cheese till soft and creamy. Add in vanilla extract.


  2. Add in plain flour, cornflour and baking powder and mix till a soft pliable dough is formed.

  3. Roll out the dough and chill in the fridge for about 30 mins.


  4. cut into shapes of your choice. Decorate as desire.


  5. Place onto baking tray and bake in a preheated oven @150C for about 20 mins or until lightly browned on edge.


  6. Cool well and store in airtight containers.

Baker’s note:
This makes a very pretty cut out cookie; it has fair & smooth surface. The edge is crisp and sharp.

Thursday, January 7, 2010

Lemon (Cream) Cheesy Balls - Eggless


The recipe comes from another new book by a Malaysian publisher. I like to buy Malaysian's book cos I find our taste are more similar. I know i can follow the amount of sugar in the book yet not end up with sugar overdose!

Also, they are so much cheaper when bought in MY. Since I was in KL for business, I thought getting a few of these. This book there cost RM20 which works out to be a little over $8. It goes for $14 in SG!!!


Lemon Cheesy Snowball

A:
130 gm. Butter
80 gm. cream cheese
50 gm. icing sugar
1 tbsp. lemon essence

B:
150 gm. plain flour
30 gm. potato flour


Method:

  1. Preheat oven to 120-140C.


  2. Beat (A) until light and pale.


  3. Sieve in (B). Use a rubber spatula to fold lightly (do not knead). Scale at 7gm each portion, shape into rounds very lightly. Arrange on lined baking trays.


  4. Bake in the preheated oven for 20-25min. Remove from oven, dust top with icing sugar, cool well and store.


My notes:


  • if you follow the instruction and divide the dough into 7g each, you will get 80psc. I go for the easy way; using the cookie scoop, I get only 35pcs.


  • Becos of the much bigger size, it took me double the time to bake my tray of cookies.


  • I added 20 drops of real lemon juice, still I do not taste the lemon very much. In fact the whole cookie is quite bland - there's not much of cheese or lemon or sugar.


  • This is a melt-in-your mouth type of cookie.


The first recipe from the book is not-so-fantastic. I wish the instructions can be clearer. E.g on the oven temperature, the author gave a range 120-140C, and says in the book "every oven has different setting". Excuse me, I thought we should be talking of the calibrated oven temperature. The author could have used the oven thermometer to provide the exact temp required, and not depend on what the knob says. Aiyoh...professional baker.


I have 4 more recipe to go... Let's see how the rest fare.

Wednesday, January 6, 2010

Chocolate Chunk Cookie

Ever since I received Kenwood Chef as a gift from J, I never do anymore manual creaming anymore. The mixer is incredible, and with the flexi-beater , I didn't even need to stop to scrap the sides of the bowl! God send!


It makes me want to bake more. More More More. I bake much faster than the rate of consumption. Tubs and tubs of cookies go to the people around me. Haha, good for my karma, I hope *LOL*


I made this cookie twice in a roll cos the first time I find they ain't crispy enough, so I gave to people who like chewy cookie.

The 2nd time, I change the proportion of brown/white sugar, and also flatten the dough slightly. Yes, the temperature was also reduced by 10C. Now I have buttery and crispy cookie! Enjoy!


Chocolate Chunk Cookie
Recipe from The Sweeter Side of Amy's Bread via http://joyofbaking.com/ChocolateChunkCookies.html

Excerpt from JOB: “If you are in the mood for a crisp and buttery chocolate chip cookie this recipe is for you. It comes from an excellent book , which features sweet treats from the very popular New York bakery, Amy's Bread. The baking soda used in this recipe aids in the browning of the cookies plus counteracts the acidity of the brown sugar. Chunks of semi sweet chocolate are used instead of chocolate chips to give these cookies a more intense chocolate flavor. You can use any combination of bitter, semi sweet or white chocolate or even those delicious toffee bits. These cookies are giant sized, but if you want to make smaller cookies, keep in mind you will have to reduce the baking time.”

2 cups (260 grams) all purpose flour
1 1/4 teaspoons baking soda
1/4 teaspoon salt
3/4 cup (170 grams) unsalted butter, room temperature
2/3 cup (130 grams) granulated white sugar - I used ½c
2/3 cup (140 grams) firmly packed light brown sugar - I used ¼c
1 large egg + 1 large egg yolk
1 1/2 teaspoons pure vanilla extract - I used 2 tsp
1 1/4 cups (210 grams) chocolate chunks - I use chocolate chips

  1. Preheat oven to 350 degrees F (177 degrees C). Place one oven rack in the top third of the oven, and one oven rack in the bottom third of the oven. Line two baking sheets with parchment paper.
  2. In a large bowl, whisk together the flour, baking soda, and salt.
  3. In the bowl of your electric mixer, cream the butter and sugars until light and fluffy (about 2 - 3 minutes). Scrape down the sides of the bowl. Add the egg and egg yolk, beating until well combined. Beat in the vanilla extract.
  4. Gradually add the flour mixture to the creamed mixture and beat just until incorporated. Scrape down the sides of the bowl as needed. Stir in the chocolate chunks.
  5. Form dough into balls, using 1/4 cup (55 grams) for each cookie. Place six balls of dough on each baking sheet. Gently flatten each ball of dough into a 2 1/2 inch (6.5 cm) round. Bake the cookies for about 15-17 minutes, rotating the baking sheets halfway through the baking time.
  6. The cookies are done when they are light golden brown in color and just set. They will still seem a little soft but they will firm up as they cool. Remove from oven and let the cookies cool a few minutes on the baking sheet before transferring them to a wire rack to cool.

Monday, December 21, 2009

Christmas Butter Cookie

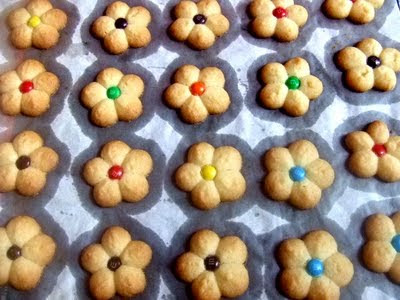
Time really flies... I can't believe it's already Christmas. I have some really nice cookie cutter that I was waiting to use for the xmas cookie but my energy level is not to the elaborate process of cookie art. So I took the easy way out bu making the spritz cookie.

The recipe comes from Betty Saw's Cookie Galore. But i made some major modification to it. I am too lazy to type it out. If you want the recipe, pls leave a comment and I will get down to it soon.

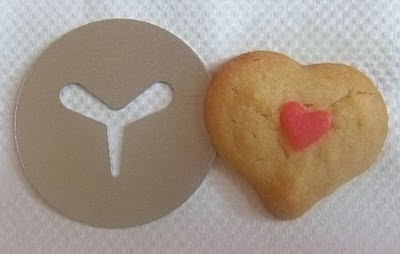
Instead of the piping bag and tip which Betty uses, I used the Cookie Press thinking that this could be easier to manage.

Mistake. It is just as tricky, if not more. Many times, the dough will not drop from the press. Other times, part of the dough dropped. Even more times I had to scoop the dough back into the press!

Having said, Sheen and I had a fun afternoon doing this. He was always eager to help me put the M&Ms, quinns, or sprinkles over the plain cookies.

For me, I had fun seeing how the pretty cookie take shape as they wiggle thru the metal plate.


haha, I burnt the cookies towards the end... cos I was just too tired to watch the oven closely.

Once I empty the cookie jar, I will certainly be back playing with these plates as the crumbly crunchy cookies are so light and buttery. I can already see myself using this recipe over and over again!

UPDATED 25/12:

Butter Cookie
240g butter, cut into cubes
90g icing sugar
270g Top flour (or Hong Kong Flour or Cake Flour)
2 tsp vanilla essence
Some full cream milk

Method:

  1. Preheat oven to 180°C. Line baking tray with greaseproof paper.
  2. Cream butter in mixer till fluffy. Add 2 tbsp of milk & vanilla essence. Mix until well combine.
  3. Sift icing sugar over butter, followed by flour. Mix till combined. Do not overmix.
  4. This is the tricky part: Check the consistency of the dough - it should be soft enough to be piped thru the cookie press. If not, add 1 tbsp more milk until it is soft enough.
  5. Fill the dough into cookie press and use as per the press instruction.
  6. Bake for 12 to 15 minutes till cookies are light golden brown. Allow cookies to cool.

Recipe Notes:

  • This is a very simple recipe which needs the best butter you can get. I use Lurpak.
  • Press and bake immediate.

Sunday, November 1, 2009

SSB - (Eggless) White Chocolate & Orange Cookies


I just realised that it is almost 2 months since my last post on cookies. Well, I have been refilling the cookie jar, but it has been the same old recipe that hardly justify the need for a post entry.

Glad to see this recipe shared by Sweet and Simple Bakes... orange and white chocolate do look like an exciting pair that I had to check it out!


White Chocolate & Orange Cookies
Recipe is from here
Makes 2 dozen
Ingredients
115g unsalted butter, softened
200g caster sugar - I used 75g brown sugar + 75g white castor sugar
1 egg - I replace with 40g milk + 20g of Cointreau
Grated zest of 1 orange (2 to 3 tsp)
1 tsp vanilla extract - I replace with Orange emulco (a concentrate)
200g plain flour -
½ tsp bicarbonate of soda
¼ baking powder
¼ tsp salt
225g white chocolate chips (milk or dark chocolate)
  1. Preheat the oven to 190C.
  2. Beat the butter and sugar. Add the egg (or milk+cointreau), orange zest and vanilla extract (or orange emulco).
  3. Sift together the dry ingredients. Stir the dry ingredients and chocolate chips into the butter mixture and combine.
  4. Roll into balls. Use your fingers to flatten onto a non-stick baking sheet 5cm/2in apart.
  5. Bake for 8-10 minutes. Cool for five minutes and transfer to a cooling rack.
    When cool, store in an airtight container for up to four to five days.

My Notes:

  • sugar: I used a combination of brown and white; brown sugar has better aroma, and also makes the cookie chewy soft. Since the white chocolate is also sweet, next round I will try to reduce sugar to 100~120g.

  • Egg: I omited the egg; replaced with 40g of full cream milk. Also added 20g of cointreau for the orangey flavour. But on the hind sight, it could be too much liquid. Next time I will try to reduce milk to 20g.

  • Emulco: I added orange emulco as I find that the natural fruit is usually muted after baking, hence the need to add the artificial to accentuate the flavour. It works!

  • Flour: Perhaps due to the egg replacement, I get pretty wet dough which spread too much in the oven. When that happens, the cookie become crisp rather than chewy. I work in another 40g of flour to address this.

  • I saved some extra chocolate chip... half way thru the bake I sprinkle some on the cookies to make it even more scrumptious.

I get 2 tubs of cookies with this recipe. Sheen loves it and asks that I save a jar for him.

I gave the other jar to my retired boss who stay in my neighbourhood. He loves all things sweet; he couldn't thank me enough for the cookies!

I just glad I have fed another happy soul :-)

Thanks Maria for hosting this SSB - pls keep the great recipe coming!

Rosie, hope to see you bounce back to action soon! Do rest well for now!

Monday, September 7, 2009

Bakerella's Milk Chocolate Chips Cookies


Over the 1 year plus of baking, I have collected quite a stake of recipe for chocolate chip cookie... and I think I more or less settled for those that J enjoyed.

But when I saw the post on Bakerella, I drooled. I mean, it looks like it will beat all my best chocolate chip recipe... and the very night, I forego my beauty sleep to bake this:


Chocolate Chip Cookies
Recipe source: bakerella

2 1/4 cup all-purpose flour
1 tsp baking soda
1/2 tsp salt
1 cup butter, room temperature
1 cup brown sugar (i used ½ c but still too sweet for me)
1/2 cup sugar
2 eggs
2 tsp vanilla
2 cups chocolate chips

1. Preheat oven to 350 degrees.
2. In a medium bowl, mix flour, baking soda and salt with a wire whisk and set aside.
3. With a mixer, beat butter and both sugars until well blended.
4. Beat in eggs and vanilla.
5. Add flour mixture in two additions until combined.
6. Stir in 1 1/2 cups chocolate chips.
7. Use a mini ice cream scoop to drop cookie dough on a parchment covered cookie sheet about 2 inches apart.
8. Bake for 8-10 minutes.

Tip: About half way through baking, sprinkle reserved chips on top of cookies. This is just to make them prettier so, some of the chips are seen on top.
Baker’s Note:
  • I bake in too low a temp, (160C) – cookie was a tad hard
  • Need to reduce the sugar further!
  • I gave this cookie jar to someone who has sweet tooth... he loves it!

Saturday, August 29, 2009

Goldilocks Polvoron


It is a filippino specialty - a cross between the shortbread and sugee cookie. And very very sweet. Not a surprise cos we know filippino has sweet tooth. But it is sooo great, my sensitive tooth withheld the ache so that I can savour the Polvoron in pleasure!

Apart from the sweetness, it is also high in Fat (41.5%) and Carbs (46.2%). I wanted my mum to try this but of not the one from goldlilocks cos the sugar level will kill her (no thanks to diabetes). Found the recipe now... just need to go out to get the sugar replacement.
*****************************
Polvoron
Recipe from here

Ingredients
1 cup plain flour
1 1/2 cup full cream powder milk (like Nido)
1/2 cup sugar ( preferable very fine sugar)
1 cup melted butter or half marg. half butter
1/2 tsp. salt
1/4 cup roasted pinipig (an immature glutinous rice - read more about pinipig here )

Preparation

  1. Roast the flour in a wok (slow heat to avoid burning) Roast flour until it is slightly brown. Take it off the heat


  2. Mix milk, sugar, pinipig, salt and melted butter with the flour. Bind them together.


  3. Try your molder : Mold one and if it is still too loose, add more butter to it. make sure that you could pick up the polvoron without it crumbling straight away


  4. Wrap them with papel de hapon.

*****************************

If you visit Philippines, you can easily get it from the mall. The local told me Goldilocks is the best brand. Since I had no time to go shopping, I buy these from the airport, presumably at a premium :-(

Tuesday, August 11, 2009

Do you call this a World Peace Cookie?

I picked up a pack of butterscotch chips from Cold Storage at my weekly groceries trip... partly becos I never eaten a butterscotch before. Eager to bake a batch of cookies with the new "sweets", I went google...

After all the research and reviewing, I decided to stick to my same old World Peace Cookie . I certainly do not have a love-at-first-sight affair with WPC, but over time, as I repeatedly baked for people who requested for it, I slowly fell for this morsel.

I replaced the chocolate chip with butterscotch chips, and after so many round of hopeless attempts to get the nicely sliced cookies, I shaped them free hand instead. I used a 10ml measuring spoon to measure out the dough so that the cookies can be even sized.
The cookies is great - very chocolately as always, and the butterscotch is sweet and soft... I do not have sweet tooth but do enjoy this combination. Only that I will reduce the sugar if going to use butterscotch next time.

And now I wonder... after all these substitutions and changes, do you still call them World Peace Cookies?

Sunday, June 14, 2009

(Eggless) Almond Suji Cookies


This recipe came highly recommended by Yum Yum, a Malaysian culinary magazine. If you have a collection of these magazines, it is issue 58!

I was reseaching for a recipe that would retain its shape well... this is for HI daughter's 1st birthday. Now you see how much stress I get to produce the winnie pooh cookie!

Back to the recipe, I was enthralled bythe perfectly shaped chick in the magazine... I was so caught up in the straight sides of the cookie!!!


Made this with another recipe which didn't quite make it.


The one below is made with the recipe here.


Almond Suji Cookies
recipe taken from Yum Yum
Ingredients A:
60g salted butter (I use Golden Churn)
50 shortening (I use crisco)
50g icing sugar (original 60g)

Ingredients B:
30g ground almond
20g suji (this is the samolina flour, available under Prima brand)
160g plain flour, sifted

Method:


  1. Beat A until fluffy. Add in B and mix into a dough.


  2. Roll out the dough into 1cm thick and cut into desired shape.


  3. Optional : I freeze it for 30min before baking... I read somewhere this will help to retain shape better. You can skip this step if you are not so concern with the shape.


  4. Bake in a preheated oven at 160C for 15min or until light golden. Remove and cool on wire rack.


My notes:


  • My dough appeared crumbly after step 1. So I simply drizzle some cold milk over it. Very sparingly. This is the tricky part: If too much liquid is added, it will be too soft to be rolled out. Then use your hand to press the dough together before rolling out.


  • Most recipe meant for rolling out are not very tasty... as it requires a high percentage of four to provide the structure. Just as this one here - it also has a high percentage of flour, but the use of suji and ground almond add exceptional flavor... Certainly another keeper!

--------------------


As I have some leftover fondant, I thought of using it up. When HI saw it she decidedly insist to cover all her cookie with the fondant! *Sigh*

J reminded me I didn't even go thru such extend for our son's birthday!

Friday, May 22, 2009

vegan orange cookie

My colleague who is all sooo excited about her daughter's first birthday happened to see my winnie pooh cookie... and she saw it fits into her theme perfectly. That's how I got bugged to bake some for her to giveaway at the party...

I understand some of her guests do not take egg, and given the large quantity that I needed to churn out, I turned to a simple vegan recipe. This is my dry run before the big grand event.

The original recipe is from Orgran's Everday Health Magazine which I pick up from here .

325 g self-raising flour (see baker's note)
60 g plain flour
220 g grapeseed oil (or any other neutral smelling oil)
180 g icing sugar
fine orange zest from 4 oranges

  1. Sift all the dry ingredients together.
  2. add dry ingredients to oil and stir with a wooden spoon to combine. Knead for about a minute to combine. (The dough should be soft but not sticky - add a tiny bit of self-raising flour if you find yours sticky)
  3. Roll out to about 0.5 cm thickness, cut out into desired shapes.
  4. Bake in a lined/non-stick pan for 20 mins at 150 degree celcius.


Baker's Notes:

  • The self rising flour will rise and fluff up the cookie so that it will be lighter and crispier. But it is obvious the leavening has affected the appearance of the cookie. I will try using plain flour instead.
  • I baked mine at 175C instead of 150C. cos I find that high temperature helps the cookie to retain the shape better. If u increase the temp, keep a watch on the timing... I only need 7-8min.

Thursday, April 9, 2009

May Peace Prevail on Earth


World Peace Cookie, this is the first thing I bake off Dorie Greenspan's "Baking from my home to yours". I enjoyed reading it cos every recipe is prefaced by a short story... I was so engrossed in reading than baking!

Some bloggers have raved how they get an organsm eating these moreish cookie... but it is a clear to me that I do not have a peaceful relationship with them.

With all due respect, these are great cookies. But all that I have been reading from the blog seem more like a soap drama or a slapstick comedy than ensuing peace and happiness!

Anyway, here’s the recipe if you are game want to try for the big O (or to spread the peace gospel):

World Peace Cookie (aka Korova Cookie)
1¼ cups all-purpose flour
1/3 cup unsweetened cocoa powder
½ tsp baking soda
155g unsalted butter, at room temperature
2/3 cup (packed) light brown sugar (I used 1/3 cup)
¼ cup white fine sugar
½ tsp fleur de sel or ¼ tsp fine sea salt (I used ½ tsp fleur del sel) 1 tsp pure vanilla extract
140g bittersweet chocolate, chopped into chips, or a generous ¾ cup mini chocolate chips ( i used 100g cocoa nibs so that I do not need to break a new pack)
  1. Sift the flour, cocoa and baking powder together.

  2. Beat the butter until soft and creamy.

  3. Add both sugars, the salt and vanilla extract and beat for 2 minutes more.

  4. Pour in the dry ingredients and mix just until the flour disappears into the dough- for the best texture, work the dough as little as possible once the flour is added, and don’t be concerned if the dough looks a little crumbly.

  5. Toss in the chocolate/cocoa nibs and mix only to incorporate.

  6. Turn the dough out onto a work surface, gather it together and divide it in half.

  7. Working with one half at a time, shape the dough into logs that are 4cm in diameter. (can use the kitchen roll as a guide to get perfectly rounded log)

  8. Wrap the logs in plastic wrap and refrigerate them for at least 3 hours. (The dough can be refrigerated for up to 3 days or frozen for up to 2 months. If you’ve frozen the dough, you needn’t defrost it before making- bake for 1 minute longer.)

  9. Preheat oven to 160˚C. Line two baking sheets with parchment paper or silicone mats. I use silicon mats cos it is recycleable, and hence a more environmentally responsible choice.

  10. Using a sharp knife, slice the logs into rounds that are 1 cm thick.

  11. Arrange the rounds on the baking sheets, leaving about 3cm between them.

  12. Bake the cookies for 12 minutes- they won’t look done, nor will they be firm, but that’s just the way they should be.

  13. Transfer the baking sheet to a cooling rack and the cookies rest until they are only just warm, at which point you can serve them or let them reach room temperature.

STORING: Packed airtight, the cookies will keep at room temperature for up to 3 days; they can be frozen for up to 2 months.

My Notes:
  • I didn’t do much modification to the recipe; mainly becos it’s already eggless. I only change 2 things:
    - reduce the amount sugar; my old tooth is not taking to sweet stuff these days.
    - Replace the bittersweet chocolate/mini choc chips with cocoa nubs.

  • Talking about cocoa nibs – I can’t remember where I learn about this thing...“Cacao (Cocoa) Nibs are perfectly roasted cocoa beans separated from their husks and broken into small bits. They are the essence of chocolate.”

    The essence of chocolate! That's what got me started excited and was looking for it frantically... I called Shermay Cooking School, Chef Warehouse, Phoon Huat, then finally realises that the humble trusty Sun Lik carries it. It’s $4 per 100g pack, btw. Is it expensive?

    It tastes terribly bitter when eaten raw, but was sooo wonderful when used in choc cookies. It adds crunchiness (somewhat like nuts) and chocolatey without the sweetness! Be forewarn though, not everyone likes the taste. J does cos bitter chocolate is his fave!!!

  • Another thing about this recipe is that the dough is so darn soft. I rolled it into logs and refrigerate to firm up before cutting. You know how difficult to cut them when it was taken out of the fridge? As I cut some pieces break which I just push it back to make rounds. BUT as soon as it goes into the oven , it spreads like nobody’s business... people get pretty slices but I... sigh... how am I to be at peace?

My ugly flatties here...

If J is up for more, I will certainly bake this again. I WANT to get the cylindrical rounds like everyone else!

Tuesday, April 7, 2009

Oatmeal Cornflakes Cookie

I am away for business whole of the week... naturally no baking for me BUT this is an opportunity for me to catch up on the posting. I have several bakes which I have been sitting in my folders for weeks!

Like this one – Oatmeal Cornflakes Cookie.

It’s the same yummy Oatmeal Cookie with some lightly crushed cornflakes.
I used the SCS butter which was said to be good by many bakers. And since it’s salted, it’s simple common sense to skip the salt in the recipe but I was dumb enough to add the salt again. The dumber thing is – I didn't realise the mistake I made... until it came out of the oven and I took a bite, and wonder why so salty!!!

Stop grining... C’mon tell me that you have your boo-boo baking moments, don’t you?

Saturday, March 14, 2009

Sweet and Simple Bakes: Oatmeal and Chocolate Chip Cookies

Sweet and Simple Bakes: Oatmeal and Chocolate Chip Cookies


I missed last month's SSB Cherry Bakewell Cake as I couldn't ditch my old habit of procrastination; I missed the deadline. This time round, I start early. You see, I am repentant :-)

The night when I felt inspired enough to get cracking, I got into some technical problem with this recipe; my cookie dough turn out to be dry and stiff... not sure if it is becos I replaced the egg with milk (I do that for most of my cookie, btw). As I was mixing, I dropped everything and went running to my notebook to seek help. The advice didn't come as instantly... so I there I sat staring at the bowl of cookie dough... Goner.

To cut the long story short, I went ahead to bake this (not a matter of option agh).


Man, glad I did... it was soft and chewy! Kahlua and vanilla extract were an aromatic combination. It may sound like an overkill, but I lurve it! It doesn't hurt knowing that the rolled oats has the health benefits (see below)!

The taste reminds me of Uncle Toby's Chewy Choc Chips... something that I used to munch on when burning midnight oil in office when I first started out in the engery sector. Those were the days... but no thanks, I do not reminisce the killing long hours. Now, I rather save the killer hours for the 2 Bs - Bevis & Baking.

Back to the cookie - I have to thank Maria and Rosie, the host of Sweet and Simple Bake for the lovely cookie.


**********************
Oatmeal and Chocolate Chip Cookies
Recipe from Sweet and Simple Bakes

Ingredients
110g (4oz) butter, softened
110g (4oz) caster sugar
110g (4oz) soft brown sugar
1 egg - * I replaced with milk
2 tbsp water - * I replaced with kahlua
1 tsp vanilla extract
250g (9oz) porridge oats (rolled oats) - I only managed to stir in 200g into the stiff dough.
110g (4oz) self-raising flour
1 level tsp salt
110g (4oz) chocolate chips

  1. Preheat the oven to 180oC (350oF), Gas Mark 4.

  2. Cream the butter in a large bowl with a wooden spoon until soft. Add the sugars and beat until the mixture is light and fluffy. Add the milk*, kahlua* and vanilla extract and mix until well combined.

  3. Stir in the oats, flour, salt and chocolate to form a dough.

  4. Using your hands, roll the dough into walnut sized balls and place slightly apart on two baking trays.

  5. Bake in the oven for 12-25 minutes or until light golden brown but still slightly soft in the centre. Allow to cool on the trays for a minute before transferring to a wire rack to cool

**********************


5 quick benefits of rolled oats:

  1. Daily consumption of a bowl of oatmeal can lower blood cholestrol, due to its soluble fiber content.


  2. It may reduce the risk of heart disease, when combined with a low-fat diet. This is because of the beta-glucan in the oats.


  3. Rolled oats have also long been a staple of many athletes' diets, especially weight trainers; given oatmeal's high content of complex carbohydrates and water-soluble fiber which encourages slow digestion and stabilises blood-glucose levels.


  4. Oatmeal porridge also contains more Vitamins B and calories than other kinds of porridges.


  5. Cooked oatmeal has a lower GI value (glycemic index) than has uncooked, because cooking releases water-soluble fiber from the grain. These fibers release glucose very slowly.

Nutrient Source: Wikipedia

Thursday, March 5, 2009

urban legend chocolate cookie (eggless)


This is quite a passe recipe, actually. You must have heard this two-fifty story a million times but even if you couldn't be bothered with the origin, you gotta try this cookie. It is amazingly good! A good recipe is meant to be timeless!

I have adapted mine to be eggless, and less diabetic.

*************************************
Urban Legend Chocolate Cookie
*************************************

200 g butter, softened
100 g white sugar
120 g packed brown sugar
1 tsp vanilla extract
2 tbsp coffee liquor (I use kahlua)
1 tbsp milk
220 g all-purpose flour (I use Gold Medal Unbleached Flour, 10%)
180 g rolled oats
1/2 tsp salt
1 tsp baking powder
300 g semisweet chocolate chips
100 g milk chocolate, grated
160 g chopped walnuts


Method:
1) Preheat oven to 375 degrees F (190 degrees C). Measure oats into a blender or food processor, and then blend to a fine powder. Set aside.

2) In a large bowl, cream together butter and sugars. Slowly beat in the milk, coffee liquor, eggs and vanilla. You may use an electric mixer if you want.

3) In a separate bowl, mix together flour, oats, salt and baking powder. Stir dry ingredients into creamed butter and sugar. Add chocolate chips, grated chocolate, and nuts. Do this step with your spatula, not the electric mixer.

4) Drop by rounded teaspoons onto ungreased cookie sheets. Use your hands to press them together - it reduces the spread. Bake for 6 to 8 minutes in the preheated oven. Cookie will be soft when it's just out of the oven but will firm up (and crisp) as it cool.

My notes:


  • Do not overcream the butter. It makes them spread more and you will get very flat cookie. Stop when the butter is smooth and visibly paler in colour.

  • Using half butter and half margaring/shortening will reduce the spread (if you really must have plump cooke) but you add transfat to your diet.

  • Kahlua adds aromatic flavour to the cookie. The alcohol will be evaporated when baked, so there's no fear for teetotaler. Replaceable with milk if you are really concerned.

  • The cookie burnt very fast. Need to keep a look out for it. Don't bother with the timer, just sit by the oven. I wept when I had to throw away a tray of charred cookie.

  • The oat, besides adding texture to the cookie, is a very smart way to add fibre to our diet. The kids didn't even realise!

  • Grated chocolate is like "layering" the chocolate flavour in this cookie. I won't skip this.

  • It is very rich with loads of choc chips - don't even think of dumping cheap choc here! You can't get away!

PS: The choc chip is overwhelming but equally irresistible!

Monday, March 2, 2009

Milo Chocolate Chip Cookie (eggless)


I learned this cookie from my blogger friend at Berry Food. Since Sheen loves milo, I thought he would love this... It is a simple recipe which can be easily made without an electric mixer.

I stick to most part of the recipe except these few changes:
  • omitting the egg, as usual

  • slightly less sugar (but 70g is actually alright... I'm just trying out)

  • instead of beating the leaveners with butter, I sift them together with flour and only added them in the final stage.

**********************

Milo Chocolate Chip Cookie (eggless)
adapted from Berry Food

110g butter, softened to room temperature
60g castor sugar
1/2 tsp vanilla extract
1/2 cup Milo
10ml milk
60g Hershey semi-sweet mini chocolate chips
150g Gold Medal Unbleached flour
1/2 tsp cream of tartar
1/4 tsp biscarbonate of soda
some M&Ms for decorations

Method:
1. Beat butter and sugar till smooth.


2. Stop when butter is smooth like this. This is not cake, so there's no need to beat till fluffy. Beat in milk and vanilla extract.


3. Add in milo first then chocolate chips.
4. Finally sift in flour mixture (flour+ cream of tartar + tsp biscarbonate of soda), and stir until till well mix. The dough is quite stiff (you can see him from where he pivot his hand on the wooden spoon), but my big boy Sheen is strong enough to manage ;-)
5. Shape the dough using a small teaspoon and place on the baking tray. No pix cos I was shaping with him, so can't take picture with my messy hands.
BTW, this is a very stiff dough which makes shaping very easy. Decorate with M&Ms if wish. I use the normal eating M&Ms which is why it cracked after baking. It should be fine if you use a baking M&Ms.
Also, this cookie only spread a little so you can do some space planning on your baking tray. Mine was too far apart liao!
6. Bake @ 175c for about 15mins. You can't miss this cos when the timing is about to be up, your kitchen will be engulfed with the milo smell!

This is a short baking session which Sheen and I enjoyed on a weekday night.