Pages

Banner

Sunday, May 31, 2009

Gwen Kit's 9th Birthday Party

This is the birthday girl and my favourite niece, Gwen Kit:


Personal time is scarce... but I can't resist the request to bake her birthday cake. I intended to make her a High School Musical Cake (her fav!) but the image file I received from sis was corrupted... and I just didn't have time to make another one.


I decorated the cake simply, and left the writing to her mum. I got this idea from a store at Jurong Point. If you have been there, it is such a big hit. Everyone wants to boast that they "made" the cake themselves...


Anyway it is a good way to encourage participation, ya?
The happy family:


Gwen Kit and Gwen In:


Not forgetting the invite which is made by this young lass:

Optima Sponge Cake with Strawberry Mousse Filling

With a typical 14 hour work day now, I had little opportunity to play around with ingredients... So when my sister asked me to bake a cake for her darling Gwen Kit, I decide to use the bag of Optima flour which I had bought some time back (it was a backup in case the start-from-scratch-sponge didn't work).

I blog-hopped and found that different baker has slightly different flour/egg/water/oil composition... like this , this and this. Even in Aunty Yochana's blog, I see the amount of water and oil varies 50-70ml for 250g of optima flour. This is again different from the recipe given on the flour package! I get very confused; I thought baking is a science and not "agar-tation". Aiyah, just simply close my eyes and go ee-nee-me-ni...


Once I decided on the recipe, the rest is easy. I took the eggs out the night before to let it loose the chill. Cut the parchment paper for my cake pan. That's it.

On Sat morning, I was woke up by Sheen at 7am... and started my mission to bake.
Sponge cake is really a no-brainer, I just all everything and beat them together. The only trick is to make sure I beat it to the right thickness; too little the cake will not rise sufficiently, too much and you will get wrinkled cake like this.

I used my brandless standmixer to beat for 7 mins on speed 2. It is full beaten when the batter forms a visible trails when it falls from the whisk after counting to 10. Most books called this the ribbon stage.


For the cake, I divided the portion into 2, baked in 2 separate session. This way I get a layers of cake instead of slicing it, a simple task which I have no confident to do without risk of ending up with more than 2 pieces.

Another advantage is that it takes a much shorter time to bake.

After I baked 2 pieces, I realised, oops, the melted butter is still in the microwave. I quickly whisked up another smaller batch, without melted butter, and baked into cupcakes. This is for me to try if it is "edible". I do not want to ruin someone's birthday with a half done cake :-(

Luckily, the cupcake taste ok, so after some thoughts, I decide to proceed with the butterless cake.


While the layers being cooled, I took out the boxes of strawberry which I have bought 2 days ago... I realised some of them have turned mouldy!! Yucks. *Sigh* I had to go the 100m dash to the supermarket!!!


Btw, Korean strawberry is not in season, my best bet is the long stem USA strawberry:


It is incredibly big and sweet!

Next, I whipped up the cream to make strawberry mousse. I followed the original recipe, realised a few mistakes:


  • The cream can only be whipped to soft peak. As it was not mentioned in the recipe, I beat to the stiff peak. This makes is impossible to fold in the strawberry paste. The mixture was loose and lumpy, which I had to sieve to remove the balls of stiffen cream.


  • unless you assemble the cake with the cake ring, you should have let the mousse set before placing the cake over it. I followed the instruction, and ended up with the mousse oozing out from the side. End up I have mousse layer as razor thin as Kate Moss!


Sponge cake (this portion is for single layer only, double if baking a tall cake in 1 go):
250g optima flour
250g egg (about 5 medium eggs, weight is without shell)
60g water
1 tsp ovalette
1 tsp vanilla extract
50 ml. milk
60 gm. corn oil (or melted butter) - i forgot to add this

Mousse:
250 gm. Strawberry
100g boiled water
1 tbsp sugar
400g. whipping cream
1 teasp. strawberry paste
25 gm. gelatine powder mixed with 100 gm. water


Coating:
200g whipping cream, whipped till stiff peak

Method for sponge cake:

1. Put all the ingredients into a mixer bowl except cornoil/melted butter and whisk till thick and pale in colour. My brandless mixer took ~ 7min on speed 2.


2. Fold in cornoil/melted butter and then pour into the 10" round tray and bake at 160C for 30 mins (this timing is for half portion, increase timing if bake the entire recipe in one go). or till the surface bounces back when touched with finger.

3. Unmould and leave to cool on a cooling rack. Repeat step 1-3.


For strawberry Mousse:
4. Puree the strawberry with water in a blender.

5. Warm the puree and sugar (add more depending on strawberry and/or your taster preference) until the sugar is melted. Then add in gelatine mixture. Leave to cool.

6. Whip the cream until soft peak only. Lighten puree mixture by taking out few tbsp of the whipped cream and mix into step 5

7. Fold in balance whipped cream. Mixture will be quite loose.

8. Place 1 layer of sponge on the cake ring/springform pan/loose bottom pan. Pour in strawberry puree+ cream mixture. Leave it to set in the fridge for 4 hours or overnight.

9. Place 2nd layer of sponge cake over.


10. Coat the cake with stiff whipped cream. Pipe border/decorate as desired.


Saturday, May 30, 2009

Euro English

Heard this one?
  • The European Union commissioners have announced that agreement has been reached to adopt English as the preferred language for European communications, rather than German, which was the other possibility. As part of the negotiations, Her Majesty's Government conceded that English spelling had some room for improvement and has accepted a five-year phased plan for what will be known as EuroEnglish (Euro for short).
  • In the first year, 's' will be used instead of the soft 'c'. Sertainly, sivil servants will resieve this news with joy. Also, the hard 'c' will be replaced with 'k.' Not only will this klear up konfusion, but typewriters kan have one less letter.
  • There will be growing publik enthusiasm in the sekond year, when the troublesome 'ph' will be replaced by 'f'. This will make words like 'fotograf' 20 per sent shorter.

  • In the third year, publik akseptanse of the new spelling kan be expekted to reach the stage where more komplikated changes are possible. Governments will enkourage the removal of double letters, which have always ben a deterent to akurate speling. Also, al wil agre that the horible mes of silent 'e's in the languag is disgrasful, and they would go.

  • By the fourth year, peopl wil be reseptiv to steps such as replasing 'th' by 'z' and 'w' by 'v'.

  • During ze fifz year, ze unesesary 'o' kan be dropd from vords kontaining 'ou', and similar changes vud of kors; be aplid to ozer kombinations of leters.

  • After zis fifz yer, ve vil hav a reli sensibl riten styl. Zer vil b no mor trubls or difikultis and evrivun vil find it ezi tu understand ech ozer. Ze drem vil finali kum


After months working with the Europeans, this joke makes sense of all the hell I went thru with these angmoh!

Friday, May 29, 2009

why birthday cake has to be round?


When I was baking a birthday cake for Sheen's cousin, he was lingering around helping me to crack the eggs etc. Then, in his childish way he asked why does the birthday has to be round.


Then while waiting for the cake to be cool, we "googled" and found these quick facts:


  • History of Birthday Cake can be traced back to the ancient Greeks who made round or moon shaped honey cakes or bread and took it to the temple of Artemis -the Goddess of Moon.

  • In earlier times, Birthday cakes were mostly round in shape. Scholars associate religious beliefs and technical compulsions for the same. Greeks offered round shape cake to the Goddess of Moon - Artemis as it signified moon. They even placed candles on the cake to make the cake glow like the moon.

  • Technical reason given for the roundness of the cake is that most cakes we know off advanced from the bread. In ancient times breads and cakes were made by hand. Typically, these were fashioned into round balls and baked on hearthstones or in low, shallow pans. Hence, these naturally relaxed into round shapes.

  • In medieval times people of England used to place symbolic objects like coins, rings and thimbles in the batter of the cake. It was believed that those who found coin in the cake would be wealthy while the unlucky finder of the thimble would never marry. If the cake fell while baking it was considered to be a bad omen and signified bad luck for the person in the coming year.

  • The phrase "Happy Birthday" did not appear on birthday cakes until the song Happy Birthday to You was popularized in the early 1900s.

  • Tradition holds that the person with the birthday may make a wish, which will come true if all the candles can be blown out in one breath.

Wednesday, May 27, 2009

Light Wholemeal Cream Cheese Bread (Sponge & Dough)


I have taken the recipe from Rei. I like Sponge and Dough method cos it is a no-nonsense recipe which give predictably soft bread. Always.

I have add in the method of kneading without using bread maker or electric mixer. Just my 2 good clean hand... I hope this will encourage more baker to try out bread making without a bread machine. If you run into any issues, pls feel free to contact me (by leaving a comment and I will try my best to help).

Cream Cheese Bread
adopted from http://allthatmatters2rei.blogspot.com/search/label/Bread


Ingredients (yield about 550g of dough)

Starter Dough
180g Bread flour
120g Water
1 ¼ tsp Instant Yeast

Main Dough
40g Bread Flour + 20g bread flour (see grunt below)
30g wholemeal flour (replaceable with bread flour if desired)
40g Water
1 tbsp Milk Powder
20g Sugar
50g Cream Cheese
¼ tsp salt
15g Corn Oil

Some flour to dust
Some butter to grease tin

Method

  1. Mix all ingredients for Starter Dough in a mixing bowl. Use a wooden spoon to mix them until you get a rough dough. Let it sit for 10min.

  2. Turn the dough onto a lightly floured surface and knead for about 30seconds. Stop and let it rest for another 10min. (Grunt: I didn't manage to get to the knead at this point without adding another 20g pf bread flour. I am not sure if it is becos I have used some wholemeal which has a different liquid absorption rate than bread flour. So if you want to save the agony of scrumbbling to open up the flour & grab the weigher with 2 handful of sticky dough, just weigh and leave it aside in case you need it)

  3. Once again, turn the dough onto a lightly floured surface and knead for about 30seconds. By now, it will be soft smooth dough which is tacky but not sticky. Cover and let it rest for 90min.

  4. After 90 minutes, prepare the main dough: add all ingredients except salt and corn oil into a mixing bowl. Use a wooden spoon to mix it first. You will get a very wet shaggy dough.

  5. Tear starter dough into small pieces, about a finger long, and add into the mixing bowl (step 4) gradually, mixing well after each addition to incorporate the dough fully.

  6. Add in salt and corn oil slowly and well thoroughly. Let it rest for 10min.

  7. After 10min, I still get a wet shaggy dough, which mean I am not able to knead by hand. So I added 20g more of flour. As flour has different water absorption ability, it is best to add 10g a time and check for sufficiency. It is ready when the dough pulls away from the bowl. It may look a little dry now but it is how it will be.

  8. Turn it out on a lightly floured surface and knead for 30sec. Add flour only if needed; too much flour will upset the liquid and affect the texture of bread. Rest for 10min.

  9. Knead again for 30sec, using flour sparingly. Leave it to proof until double in size. (30-60min). I refrigerate the dough at this time and bake it the next morning.

  10. The dough is fully proofed when you dip a cleaned, floured finger into the dough, and the dent recovers slowly. If it recovers immediately, proof for another 15min then check again.

  11. Deflate the dough gently and turn it onto a lightly floured surface. Divide it into 50-60g dough and let it rest for 10min before shaping. The rest time allows the gluten to relax and more elastic when you try to shape.

  12. Elongated the dough, place 2 slices of ham over it, and roll it up like swiss roll. Make a cut in the middle and turn both ends out. (the side view of the bread below may give you a better picture of how it is shaped). Place on a muffin pan or any baking pan for 30min.


  13. Bake at 170 deg.C for 30 minutes.


My Notes:
Sheen loves cheese. So usually I will bake the bread with a slice of cheese over it. As you know, the cheese melts and drip all over the bread & pan when it gets hot in there. The washing & scrubbing is ok, but the cheese ended up being very hard and burnt!

What I did this time round is to leave out the cheese when baking. Only when the bread is done, I placed a slice of cheese over it. I also tried to put the cheese-covered bread back in the oven for few minutes, using the remnant heat to melt it softer but the result is better when I simply leave it on the wire rack.

If you want to know how it looks with the cheese in the oven (even though for a short 2 min), see the small pic above; those 2 on the left.

Friday, May 22, 2009

vegan orange cookie

My colleague who is all sooo excited about her daughter's first birthday happened to see my winnie pooh cookie... and she saw it fits into her theme perfectly. That's how I got bugged to bake some for her to giveaway at the party...

I understand some of her guests do not take egg, and given the large quantity that I needed to churn out, I turned to a simple vegan recipe. This is my dry run before the big grand event.

The original recipe is from Orgran's Everday Health Magazine which I pick up from here .

325 g self-raising flour (see baker's note)
60 g plain flour
220 g grapeseed oil (or any other neutral smelling oil)
180 g icing sugar
fine orange zest from 4 oranges

  1. Sift all the dry ingredients together.
  2. add dry ingredients to oil and stir with a wooden spoon to combine. Knead for about a minute to combine. (The dough should be soft but not sticky - add a tiny bit of self-raising flour if you find yours sticky)
  3. Roll out to about 0.5 cm thickness, cut out into desired shapes.
  4. Bake in a lined/non-stick pan for 20 mins at 150 degree celcius.


Baker's Notes:

  • The self rising flour will rise and fluff up the cookie so that it will be lighter and crispier. But it is obvious the leavening has affected the appearance of the cookie. I will try using plain flour instead.
  • I baked mine at 175C instead of 150C. cos I find that high temperature helps the cookie to retain the shape better. If u increase the temp, keep a watch on the timing... I only need 7-8min.

Sunday, May 17, 2009

Mango Pudding


After my last effort at Mandarin Orange Pudding, I have been looking out for opportunity to make some mango pudding.

As you know, mangoes are usually quite expensive here... so I would rather eat them fresh then to use them for all the processings.

But recently, thanks or no thanks to the soaring temperature, its mango harvet time! I am paying less for sweeter & bigger mangoes now!

**********************************

Mango Pudding
adapted from here

Ingredients
(A)
300g milk
80g sugar
2 ¼ tsp konnyaku powder

(B)
300g mango puree
20g custard powder
2 egg yolk

(C)
1 tbsp butter


Steps:
1. Mix konnyaku powder with sugar evenly before adding milk. Again, stir to make sure they are well mixed before putting it over low fire. Boil until konnyaku powder dissolved.
2. Mix (B) together until well combined.
3. Pour mixture (A) into mixture (B) and stir until well combined.
4. Stir Step no.3 over low fire until mixture thicken.
5. Remove from fire and stir in butter and colouring.
6. Pour into mould and leave to cool.
7. Chill in the fridge, unmould and serve.

**********************************

Thursday, May 14, 2009

Sweet Brandy Buns


Shortly after the last failed attempt , I found out what contributed to those heavy and dense from the author's forum:

"...The dough needs a lot of active yeast to lift all that butter, cream and alcohol and the brief rise given to a fatty ferment in THL (The Handmade Loaf) just isn't enough. So warm the milk, leave the cream out (and put it in with the dough ingredients), increase the yeast as it has a rich dough to fight through and reduce the sugar. ...he problem is that the yeast can't access the starch because of all the butter, and the whole mixture stops fermenting and feels dead. "

Apparently many bakers who had tried out ran into similar problem.
Below is the revised recipe which I have tested out and happy to report the results was a fluffier and softer bun. In fact it is very close to the rich Brioche bread! My only complaint is the bread ain't as sweet as I would like, and the brandy taste is just enough to titillate!

----------------------------------
Sweet Brandy Buns
by Dan Lepard

For the ferment:
200g warm milk at 30C
1 level tsp yeast
2 tbsp caster sugar (I used brown sugar... I ran out of caster sugar!)
150g strong white flour

Dissolve the yeast in the milk then add the sugar and flour. Leave in a warm place for 1 hour until doubled in height.

For the dough:
350g strong white flour
1 1/2 tsp fine sea salt
100g unsalted butter, softened
1 large (60g) egg
50g brandy (I use Cointreau)
50g double cream (I used President)
  1. Measure the flour and salt into a bowl then rub the butter through it evenly. In a jug beat the egg, brandy and double cream together, then combine this with the ferment until smooth, then tip this in with the dry ingredients and mix to a soft and sticky dough. Leave for 20 minutes, then give 3 brief 10 second kneads at 10 minute intervals. Cover the dough and leave for 1 hour folding it once during that time.
  2. Divide the dough into a dozen 80g pieces (I divided into 50-60g), and shape each into a smooth ball. Line a large baking sheet with non-stick paper and place the balls 3 x 4 on it, leaving space between for them to puff and bulge. Loosely cover the tray with a tea towel and leave for 1 1/2 hours till doubled in height.
  3. Preheat the oven to 200C. Brush the surface of the buns with brandy and dredge heavily with caster sugar. Bake for 15 minutes then reduce the heat to 180C and bake for a further 10 - 15 minutes until golden brown. Leave to cool on a wire rack.

-----------------------

To increase the liqueur taste and sweetness, I dipped the bun into the cointreau and sugar. Double dredging!


I know the thick sugar coating look somehow disgusting but this is the way I like mine!

Sunday, May 10, 2009

What can be better than the choc mint cake?


... a sugarless chocolate mint cake, of course. I have been thinking about it cos I didn't get to really taste the last one. This Mothers' Day seemed like a good excuse for me to try it out given my mum is also diabetic...

I have also been thinking how to do the nice zebra marbling, but I guess its best I do something else rather than keeping banging my head against the wall. What I did for this celebration was a mint cake with chocolate frosting:

Comparing the 2, I prefer this. As I cut the cake, the kids went "wow, its green inside!". Also I find this easier to prepare than the other marbling one - no need to separate the batter into 2 bowls, plus the alternating spooning of batter into the baking pan.

Mint Cake with Milk Chocolate Frosting
200 gm. Self raising flour
230 gm. Butter, softened
190 gm. Castor sugar or Maltidol powder
230 gm. Eggs (~5-6 eggs, depends on the size)
Optional: ½ tsp ovalette (whisk with egg)
1/2 tsp Green colouring
1/2 tsp peppermint extract
1 tbsp peppermint liqueur
  1. Pre-heat oven to 160C. Line a 10 " round cake pan with greaseproof paper.

  2. Sieve the SR flour into a mixing bowl. Add butter and cream them together well.

  3. In a separate bowl, whisk the eggs, sugar/matitol & ovalette (if using) until spongy. (about 6min, depends on the mixer)

  4. Add colouring, peppermint extract and liqueur into the egg mixture. Beat for 30 sec to combine well.

  5. Add flour paste (step 2) gradually to the egg mixture and beat till smooth. (about 2 min)

  6. Pour into the prepared baking pan and bake for about 35min or until done.

Note:

  • this recipe above gave me just over 1 inch tall cake in a 10" pan. Much shorter than I thought, so I measured out all the ingredients all over again and made 1 more recipe to get a taller cake.

a rather short cake agh....


Milk Chocolate Frosting

recipe from Matt Lewis & Renato Poliafito's "Baked", thru crummb:

8 ounces (224g) bittersweet chocolate, finely chopped
8 ounces (224g) milk chocolate, finely chopped
1-1/2 cup heavy cream (360ml)
2 tablespoons light corn syrup
1-1/2 cups (3 sticks / 339g) unsalted butter, soft but cool, cut into 1-inch pieces


  1. Place both chocolates into a bowl. In a saucepan, bring cream and corn syrup to a boil, then pour immediately over the chocolate. Let stand for 2-3 minutes, then stir until mixture is completely smooth. Cool to room temperature.

  2. Beat in butter pieces using whisk attachment on medium speed.

  3. Frosting should be smooth and silky. Chill to spreadable consistency.

This frosting is much much much better than the previous ganache. Partly of the better whipping cream I used this time round ( i used Nestle cream the last time), partly of the good chocolate that goes into it, partly of the butter beaten into it. It is silky smooth delicious, just as I expected! My only quarrel is that it is very light and could not coat the cake very thickly. When put in between the layers, all the extra got squeeze out to the sides. When put on the side, the extra "slides" its way to the cake board. Yo!

I do not know what's wrong, the cake could not sit tight on the cake board. It slid on the board, and ruined the sides. I can't imagine what if I am doing this is for some grand event? BTW, if you know something that I should have done, can you leave me a comment below?


Just a bit of thoughts - this Mothers' Day is quieter than last year. Some may think I read too much but I think it is attributed to my mum babysitting for my brother's new born and that has somewhat created some inevitable conflicts with her daughter-in-law.

We had celebrated many occasions together but this year, they chose not to turn up... how sad right?

One day I will be someone's MIL too, and I wonder how I will handle the intricate yet complex relationship :-(

Til then, I propose this toast to all the wonderful mothers out there! HAPPY MOTHERS' DAY.

Wednesday, May 6, 2009

Guava Lava


If you ask around, I am sure not many will count the humble guava as their favourite fruit. Some people eats slice guava with the sour plum powder which I think it is more for the sour plum than the fruit.

I am among the guilty ones, btw... and you can't blame me cos the guava on it's own is bland and hard.

But lurking beneath, it is a super fruit - it contains 5 times more vitamin C than an orange, cholesterol, saturated and sodium free, plus low in fat and calories, high in fiber. It also contains key nutrients like: carotenoids, folate, potassium, fiber, calcium and iron. Calcium is typically not found in high amounts in many fruits.

You do not need me to tell you that diets low in saturated fat and cholesterol and rich in fruits and vegetables that contain dietary fiber may reduce the risk of coronary heart disease!

With such benefits, all we need to find a palatable way to eat it :-)

I was in seventh heaven when I found this is a very simple yet so addictive creation from kitchencapers . I have to thank Yvne for sharing this recipe! She's right, no one (except Sheen) can keep their hands off the tub of guava!!

*******************************

Marinated Guava


What you need:
3 guavas, de-seeded and sliced very thinly-about 2mm thick
2 pack dried mandarin orange skin sliced thinly into strips
1 red chilli sliced thinly (optional - I omit)

How to do this:
Marinate everything together and leave overnight or about 6-8 hours in the fridge. Eat it while it's chilled.


*******************************


I made this 2 weeks ago... when the temperature was a scorching 36C! Nothing beats snacking this delightful fruits on a day like that!


Preserved Mandarin Oranges : I bought this from Prime Supermarket in Jurong West for $1.25 (for 4 packets). I have never not tried using other brands... but as in any recipe, the basis rule is that it must taste good on its own. Don't use the dried mandarin oranges from medical hall - it is bitter.

Guava: I generally get the thai seedless version. It cost a little more, but I find the "flesh" to be softer and not so "siap-siap". Only it says seedless, I still remove the core before slicing... all for my fussy eaters at home.

It may look dry initially- there's no need to add water. After the hours sitting in the fridge, guava itself will gives out the juice to marinate itself!

The only trick is to make sure you get the right proportion of guava to dried mandarin oranges. Too little, your guava will be bland. Too much your guava will be overly salty. It is not rocket science, so much taste and adjust along the way. Simple! For myself, I find the best ratio to be 1 packet to 800g of guava.

BTW, I first made this 2 weeks ago... when the temperature was a scorching 36C! What is like snacking on this fruits?

Shiok!

Friday, May 1, 2009

Sweet and Simple Bakes: Vanilla Cupcakes


Sweet and Simple Bakes: Vanilla Cupcakes

You know, I was sooo furious over the omission of my previous entry to favourite SSB monthly round up. And I swear to stay off all the future entries! Tsk tsk. Did I hear the little birds say petty???

But on the very last day, I gave up resisting the sweet and simple recipe, and got down to bake it. I wanted to try cos this is an all-in-one method; no creaming, no whisking. Just mix everything together and bake. I have seen this method used in many books but doubtful of the results.

It coming from SSB gives a different level of confidence :-)


Vanilla Cupcake (All-in-1 Method)
Recipe is taken from here
Yield 12 cupcake

175g self-raising flour
1½ level tsp baking powder (* see note 1)
175g butter, softened
175g caster (superfine) sugar - I used 110g
3 large eggs (* see note 2)
2 tbsp milk (* see note 2)
1 tsp vanilla extract (* see note 2)

Method
  1. Preheat the oven to 180°C/Fan oven 160°C/350°F/Gas mark 4.

  2. Sift the self-raising flour and baking powder into a large bowl, and then add the butter, caster sugar, eggs, milk and vanilla extract. Beat together until well mixed, trying not to over mix the mixture.

  3. Spoon the mixture equally into the prepared paper cases and bake in the preheated oven for about 20 minutes or until the tops spring back when lightly pressed.

  4. Leave to cool in the tin for 5 minutes then turn out to completely cool on a wire rack.


My Notes:


  1. I'm not sure if it's too much leavening cos self rising flour also contains baking powder. BTW, my cupcake risen too much in the oven and overflowed. They were 80% filled.

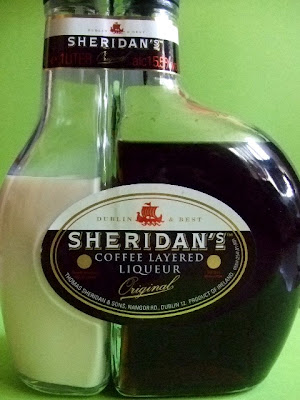
  2. Instead of using 3 large egg, I use the normal egg I have which is roughly ~48g each. I top up the rest of the weight with Sheridan vanilla cream liqueur. With the vanilla cream liqueur, I skipped the vanilla extract. If your egg not the large variant, I am sure you can just top the just of the weight with milk.

  3. In this all-in-1 method, it is important to ensure the butter is soft enough to blend in quickly with all the other ingredients. I took it out of the fridge for 2 hours.

  4. When the cupcake is cooled, I filled the centre with raspberries jam using tip 230 - a sweet treat for my little Sheen!

As for the buttercream, I used the same tried-and-tested version which is lighter on my taste bud and waistline :-)

I tried to make them colourful frosting like what Rosie & Maria had... but I realised that it means quite some wastage... which is not ecologically friendly... so in the end I am neither colourful nor monochrome - not a good thing agh.

The results: Thanks for the trusty recipe, the cake is delightfully light! The vanilla and butter comes across very strongly... the way I like! The best part is that it only takes 15min (by hand) to mix them all up and bake!

This is Sheen's breakfast!