Pages

Banner

Tuesday, February 24, 2009

my comfort food...


I usually make a conscientious effort to avoid or reduce the usage of eggs in my bake. But today.... After seeing a cooking demo (by the wok promotor at a department store), I couldn't get the aromatic custard out of my head.

I lied on bed, tossed and turned, urned and tossed. Past 1am, I succumbed. Got out of the bed, and wandered into the kitchen.

I knew I had to make this tonight. The humble kaya.

*********************

Traditional Kaya (Coconut Jam)


3 Eggs
200ml coconut milk (I use Kara for convenience)
5 tbsp sugar ( i used brown sugar)
Juice from pounded pandan leaves (I omit)


  1. Mix egg and sugar together, stir/beat until the sugar dissolved.

  2. Add coconut milk and mix well.

  3. Heat up the non-stick pot on low heat. Add 3 tbsp (in addition to the 5 tbsp) of sugar to the pot. When the sugar start to brown, stir slightly and pour in the coconut mixture. Continue stirring (important) until it thickens.

  4. The custard will thicken further when it cool, so if you like it to be more spreadable, off the fire when it is just begining to thick. I can't put an exact the timing... trial and error lor.

  5. When done, off fire and leave it to cool. Store cooled kaya in a clean jar - will keep well in room temperature for 1 week (mine never last beyond that so I am not sure if 1 week is the absolute shelf life). This custard is not difficult to prepare, so it make sense to make small batches so that the family can enjoy fresh, addditive/preservative-free kaya all week long!!!

*********************


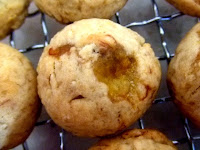
When the kaya was ready, I rummaged my freezer for bread. I must have slapped on about half of this portion on a sitting.


The warm kaya warmed my stomach and my heart, bringing me back to the childhood days where my mum will make her own kaya. All her 5 kids were so gluttony that we all ate the kaya right out of the hot pot... that she was left with nothing to bottle...

Now you see why I was sleepless at 3am

Sunday, February 22, 2009

To-Die-For Blueberry Muffin (Eggless)


Would you die for this muffin?

I won't, my life is more than just eating and baking. Besides the dingy lighting at 6am does no justice to this lil'thing.

But this muffin is darn good. As the review always say, if you bake only 1 muffin this year, make this the ONE.

Will you bite now?


convinced?


***************************


To-Die-For Blueberry Muffin (Eggless)
adapted from here.


Batter:
1 1/2 cups all-purpose flour
1/2 cup white sugar
1/2 teaspoon salt
2 teaspoons baking powder
1/3 cup vegetable oil
2/3 cup milk
1 cup fresh blueberries

Topping:
¼ c white sugar
1/6 cup (23g) AP flour
1/8 cup (28g) butter
1 tsp ground cinnamon


DIRECTIONS
  1. Preheat oven to 400 degrees F (200 degrees C). Grease muffin cups or line with muffin liners.

  2. Combine 1 1/2 cups flour, 3/4 cup sugar, salt and baking powder. Place 1/3 vegetable oil and 2/3 cup milk in a separate cup. Mix this with flour mixture. Fold in blueberries. Fill muffin cups to 80% mark, and sprinkle with crumb topping mixture.

  3. To Make Crumb Topping: Mix together all ingredients. Mix with fork, and sprinkle over muffins before baking.

  4. Bake for 20 to 25 minutes in the preheated oven, or until done. (My oven takes only 20min.)


***************************
My Notes:


  • The original portion for the topping was too much, so I halved it. The one given here is already halved.

  • The crumb topping melt very quickly in our weather. So I mix it first, then keep it in the fridge till I am ready to use them.

  • The crumb top, which gives your muffin a sparkling look, is sweet and crunchy - try not to omit. Unfortunately it go soft very quickly, so it is best eaten on the same day.

  • To prevent the berries from sinking, I toss them in 1 tbsp plain flour. It works.

  • When choosing blueberries look for firm, plump, fragrant, dark blue berries with a dusty white bloom. The white bloom is the blueberry's natural protection against the sun and is a sign of freshness. Always check the underside of the container for any wet spots or staining. Discard any soft, moldy, or crushed berries.

  • I followed the original instruction to fill the muffin cup right to the top... it overflow, and drip onto the oven, creating fumes and char. Tsk. This is not the first time I had a overflowing muffin... sigh... stupidity is making the same mistake twice!

  • One last thing: in omission of an egg, which acts as a natural emulsifier, the oil is not "held" in the batter properly. The end result is that the muffin liner is very oily. If you are particular about the appearance, or your diet permit, add an egg.

Friday, February 20, 2009

Ding Tai Fung@Jurong Point

This is the first time I went to Jurong Point Extension since the new wing opened few months ago. I am quite happy to find some "downtown" eateries, like this taiwanese dumpling joint 鼎泰丰, now being closer to the heartlanders.

We ordered the famous xiaolongbao, steamed spicy pork and vegetable wonton (紅油抄手), vegetable dumpling, fried rice with eggs, shrimp and pork wonton noodle

The xiaolongbao is juicy if you can finish them in a jiffy. Else, the thick "skin" dried up and hardened when it's cold. In that sense, 紅油抄手 fared better cos it is sitting in the sourish and spicy gravy. Good till the last moment!!! Ya, that's my fav... (ever since I watched Meteor Garden)!!!

Veg dumpling and noodle are decent fare. But fried rice is awesome. Sheen whacked 2 bowls very quickly!

A well-fed boy is a happy boy!


Wednesday, February 18, 2009

quest for a chocolate mint cookie to "wow" me continues...


I had a go at mint chocolate cookie. This is from Florence, who is a veteran baker, and I usually get fair success from her recipe.

But this cookie got me wondering if the problem lies with the ingredients, the instruction, or the baker?


I used a little less sugar and a different mint choc. Also, baked grossly a shorter time than given here - the time stated was 25-30min, but my cookie already threatened to burn at the 8min mark, so I stop there. The cookie is crispy but not the best cookie, I got to be honest!


Ingredients:
60g butter
1 tsp corn oil
30g icing sugar (I used 20g)
1/8 tsp of salt
100g cake flour
15g cocoa powder
pinch of baking soda
50g Andes Mint Parfait, chopped


Method:
1. Cream butter, corn oil, icing sugar and salt till light and fluffy.
2. Fold in the sieved flour, cocoa powder and baking soda mixture.
3. Add in the chopped up Andes Mint and mix till a soft dough is formed.
4. Divide the dough into 18 pieces shape it round and flatten them a little.
5. Bake on a lined tray at 180C for 25 - 30 minutes.

Tuesday, February 17, 2009

Double Chocolate Mint Cookies


This cookie was created by Gina back in 2005, and it started a craze in Kitchen Capers. (see her fan's review here. To get the original recipe click here . The one I posted here has been adapted for my eggless version:

Ingredients
115g salted butter
180g Self Raising flour } sifted together *
1 tbsp cocoa powder } sifted together *
50g castor sugar *
30g light brown sugar *
40ml milk *
40g candy cane *
1 cup of mini chocolate chips *

Method
1. Chopped the candy cane finely and set aside.
2. Cream butter, sugar in a mixing bowl till creamy.
3. Add milk to beat till well mixed.
4. Turn off mixer and fold in flour & cocoa mixture. When combined, gently stir in chocolate chips and crushed mint.
5. Lined a baking tray with baking paper. Do not grease or the cookie will spread even more.
6. Drop small tsp of dough onto the lined baking tray. Leave sufficient space for cookie to spread.
7. Bake in preheated oven 180C for ~10 mins. *
8. Remove and cool completely on wire rack.

My Notes: (* changes I've made to the recipe)

  • Candy canes , this is said to be a suitable substitute for polo in the forum but IMHO, this is not the ideal candy. The candy cane is very stickly when chopped, and I still end up with lumps of candies. Also, when baked, the candy boiled and flow over, creating "valcono craters" in your cookie. In addition, it makes the cookie very sticky though it hardens and becomes better when cooled.
  • Chocolate - the large amount of chocolate makes it burnt easily, especially if your baking tray is dark coloured like mine. I didn't take note of the exact timing but I had to turn down the temperature mid way thru', and off the oven before the time was up.
  • I replaced egg with milk.
  • Sifting flour and cocoa powder together makes folding-in easier.
  • I reduced the sugar from the original 80g white + 50g brown but it is still too sweet for me. Could be due to my chocolate chips being semi-sweet.
  • Due to the size of the cookie, mini chocolate chips is better than the regular chips.

Overall, this is a very rich chocolate cookie... fit for chocoholics. But I think it could be better... next round, I will play with polo mint, peppermint extract or mint choco.

Wish me luck.

Sunday, February 15, 2009

die hard romance, pls raise your hand

I am not. Which explains why you didn't see any fanciful Valentines' Day bakes. This jar of cookie is probably the closest I get to being romantic:


It was first meant for Sheen to play cos he's bored on a Friday night. Even the reason ain't very romantic agh.

The recipe is from here . I always have doubts about using taro (or yam as more commonly know in asia) in cookies - if guru like Gina is struggling to get the cookies right, let alone me :-) I guess that's nothing to lose since the taro paste was leftover from the earlier steamed taro cake.

Back to the Taro Cookies, I adhered to most part of the recipe, making changes to only 2 things:

  • Shortening - all shortening contains transfat, it's a big NO-NO in all my little bakery. I used butter instead.
  • Egg wash - it does not make much sense for me to break an egg for the wash and discard the balance, so it is omitted.

bits of yam lurking beneath:

Verdict:

  • The dough is very hardy. It holds the shape very well, making this suitable for shaped cookies.

  • There's a very evident yam taste, and a delightful crunch on the first day. The little salt in it also makes a little addictive, much like the World Peace Cookie.

  • Unfortunately things go down hill on the second day... it becomes softer, more chewy, which I dislike. But gosh, I am hook to the saltiness - I kept reaching out 1 after another, perhaps a slim attempt to find a crunchy one. Or am I trying to decipher what went wrong...
For those who still have your hands raised, hope you had a lovey celebration yesterday!

Friday, February 13, 2009

Recycled Cake

I baked some eggless choc cake for the visitors during lunar new year. There were some leftovers still sitting in the freezer.... which is just right for recycling into some cupcake pop!


The recipe is modified from Bakerella. Her cupcake pops is like Victoria Beckham - chieselled and classy! *blushed*

Cupcake Pops
What you need:
Cake scraps, coursely crushed
Buttercream
Kahlua (or expresso/coffee for non alcholic version)
Dipping chocolate (I use white chocolate)
Sprinkles to decorate Cookie Cutter

1. Put the crumbled cake pieces in a big mixing bowl.

2. Add some buttercream & kahlua. Mix well.

3. Press some cake mixture with hand and press them together to try form it into a ball. Add more buttercream and/or kahlua as required, a little at a time. If it becomes too mushy, it will be very difficult to handle.

4. Using a spoon form 2" balls. Place them on a baking sheet covered with a sheet of wax paper. repeat until all the cake mixture are used up. Refrigerate to let it firm up.

5. When it is firmed, use a cookie cutter to shape the cake pop.

6. Put dipping chocolate in a microwave-safe bowl and melt according to package instructions. Once chocolate is thoroughly melted, dip cake pop into the chocolate. Place dipped cake pop on sheet covered with wax paper. If decorating with sprinkles, put the sprinkles on quickly, as the chocolate hardens quickly.

My notes:
Easy as it may seem, but it's quite tricky...

  • First I couldn't get it to clump together, so I kept adding buttercream to it.

  • By the time they come together it was too soft to handle. So, I refrigerate it for a while.

  • When cold, it is too hard to be moulded. I had to press, squeeze, and coax it to fit into the cookie cutter.

  • Melting chocolate... another challenge; I put it into a bowl and microwave at 3o seconds interval. Take out, stir, check. Back to microwave. I repeat this at least 5 times and still staring at semi hard chocolate. Exasperated, I had to rummage my cabinet to find the double boiler to do bain marie. Wash and dry the pots, transfer the chocky mess into the pot and stir stir stir until I get a smooth chocolate mixture.

  • Even trying to coat the cake pops with chocolate takes some skills. I tried to hold the bottom of the cake and dip the top into the chocolate bowl... oops, the cake broke. So now I have half the cake in the choc dip and the other half on my hand don't know what to do :-(
My chicken hand duck feet! *sigh* I am sure you can do better than this!

Earl Grey Cookie

I must have bought the cookie press more than a year ago and have yet to formally use it. The first time I filled it with the cookie dough, the dough was too hard to be pressed... so was the 2nd and third time.
Until this one... Finally I get to show off some pretty cookies!

Earl Grey Crisp needs some Earl Grey... and I have these 2 types in my cabinet:

I opted for the one on the left cos that's suppose to have a stronger flavour.
Cut open the tea bag and this is what I've got. It is fine enough so no need to grind anymore. Else, you may need to whiz in the food processor for few seconds.


Earl Grey Crisp
Earl Grey tea bag/leaves, finely grinded 1 tbsp (about 1 tea bag)
Butter 100g
Icing sugar 40g
Whipping cream 70ml
Cake Flour 160g } (Sifted together)
Baking Powder ¼ tsp }

1) Cream butter. Add sugar, whipping cream & tea leave, one at a time, mix well.
2) Add the sifted flour mixture into butter mixture. Chill for at least 30min or overnight..
3) If use cookie press, leave the dough to soften before adding into the press.
4) Bake at 180C for 15min or until brown.

Baker’s Notes:
  • The earl grey is very light... only a slight aftertaste in the tongue. Most people tell me "earl grey meh?" Can try to use more tea leaves or use the tea from Marks & Spencer, as advised by Aunty Yochana.
  • This dough is very soft, it is difficult to shape with your hands. If no cookie press, then use a piping bag to pipe it out.
  • This is the kindda of cookie suitable for mass production. :-) The cookie press is so fast and convenient. I will certainly make this again (in bigger batch) when I finish up all the new year goodies!
  • Overall I like this cookie for the light texture. So does my sweetie Sheen!

Thursday, February 12, 2009

Chocolate Truffle

Made these truffles using all the ultra sweet chocolates we received in Christmas!


Chocolate Truffles

100g chocolates, coursely chopped

100g whipping cream (e.g. President)

Good quality cocoa powder for coating


  1. Heat up the whipping cream until almost boiled.

  2. Remove from heat and stir in the chopped chocolate (chopping make melting faster). Stir until chocolate melted, and form a smooth paste.

  3. Leave to cool in room temperature, then refrigerate for few hours.

  4. The texture is somewhat like ice cream by then. Use a spoon to scoop the choc mixture and form into small balls.

  5. Coat with cocoa powder. Enjoy.

I put them in small packages so that Sheen can bring to school to share with his friends.

Wednesday, February 11, 2009

The butter cake to resist effect of alcohol...


Yep, that's what I read- "... something that’s 100% resistant to the effects of alcohol and it tastes way better than rice or bread". Ummm.

With such magic, I knew I got to make this. And I did, for a friend's birthday... who told me he may come Singapore.

But the trip was disrrupted by the unexpected snow (in London)... so I frozen the cake.. I have almost clean forgotten about the week-old cake until last night!

Today I brought it to office, and all I got was a small slice. The rest??? the V-sign says all about the cake!

Recipe is here.
PS: It tastes so dejavu... then I found out that this recipe is almost identical to Carol Durst's "I knew you were coming so I bake a Cake"!

Tuesday, February 10, 2009

The Perfect Butter Cake


Simply Delicious Yellow Cake
(adapted from The Sweeter Side Of Amy’s Bread, by Amy Scherber and Toy Kim Dupree)
I get this from crummb .

210g unbleached flour (e.g. Gold Medal brand at Cold Storage in Holland Village)
1/2 Tbs + 1/2 tsp baking powder (1x10ml spoon)
1/2 tsp sea salt
170g full-cream milk, at room temperature
1 tsp vanilla extract
160g unsalted butter, slightly softened
210g castor sugar
130g eggs (about 2-1/2 eggs), at room temperature

1. Preheat oven to 180 deg C. Line bottom of a 9-inch pan with parchment. Butter and flour the bottom and sides of pan.
2. Sift flour, baking powder, salt together, then whisk with fork for even distribution.
3. In a separate bowl, combine milk and vanilla.
4. Using an electric mixer with paddle attachment, beat butter on medium for about 30 seconds (if you have a KitchenAid, turn on to power #4). Add sugar slowly and beat on medium-high (KitchenAid #6) for 2-1/2 minutes. Then add eggs slowly and beat on low (KitchenAid #2) until just mixed in. Scrape down the sides occasionally to ensure thorough mixing.
5. Reduce speed to the lowest possible (KitchenAid #1) and add in flour mixture in three parts, alternating with 2 parts of milk mixture - beginning and ending with flour mixture. Do not overmix. The final batter should be smooth and luxuriously runny, almost like whipped cream.

Bake for 1 hour or until the cake is just beginning to shrink away from the sides of the pan.


Notes:


  • I resized the recipe to use up the entire 200g-block butter. Cos I have no space to keep the balance 40g butter. Simply multipy every single ingredient by 1.25 if you wanna do the same.

  • I only use 180g sugar for my resized recipe. It is of the right sweetness for most colleagues. (some say it can be sweeter.) I may try 160g next time. I normally reduce the sugar content by ~30% if baking with ang-moh recipe.

  • I should've used 163g of egg but I simply used 3 eggs (150g in my case), and top up the rest of the liquid by milk (213g+13g).

  • I used double action baking powder for this.

  • As in any butter cake, it depends on butter for flavour... so this is not one recipe where I can get away with cheapo butter. Elle & Vire is just so right for this, I gotta tell you!

  • My first cake rise to a dome. For the 2nd one, I use the small spoon to push the batter to the sides to almost 1/2 an inch ; I get a nice flat top after the cake cooled.

Mandarin Orange Muffin


This lunar new year my home is flooded with mandarin oranges... from J's business associates, suppliers, etc. Even after all the give-aways, we are still stuck with 2 small crate... and I now have to think how to bake off before it deteriorates to the point of no return!

Last year I thumbed thru my cookbooks for a suitable recipe but there ain't any. Strange. Then I realised that it is becos this cousin of orange ain't exactly common in the west. Rachel said what they get in the supermarket are canned.

Ok, so I improvised my own using the same old muffin recipe. Simple. Yet failproof. So far.


Step 1: I removed the rind and white pith. Segments are separated with all the albedo and membranes removed.
The is the most troublesome step.

200g Self Rising Flour, sifted
1/2 tsp baking soda
80g soft light brown sugar
100g grapeseed oil (or any veg oil that you have)
100g milk
40g juice from mandarin oranges.
100g prepared mandarin oranges (see step 1)

  1. Preheat oven to 200C. Prepare muffin pan or cup.
  2. Sift the flour and baking soda together in a big mixing bowl.
    Add brown sugar. Stir to combine well.
  3. Add the oil, buttermilk, Kahlua & banana essence in a measuring cup. Mix well
    Make a well in the flour mixture and pour (3) into it.
  4. Stir briefly to moisten the mixture. It's ok for the mixture to be lumpy.
  5. Gently fold in the m.oranges.
  6. Spoon the mixture into the prepared pan/cup.
  7. Bake for 18~20 min until the skewer comes out clean when inserted into the muffin.
  8. Cool on the wire rack for 10min.

To be honest, the texture ain't quite what I expected. The crumbs is a bit too moist to a point of being watery. This was arising from the fact that I tried to use up the balance cake flour instead of AP or SR flour that gives better result. Perhaps a few minutes in the oven will solve the problem. Well... anyway...

Anyway, these were packed up for Sheen to bring to school tomorrow!

I love baking for kids - they never complain!

Sunday, February 8, 2009

Help! Need to clearing out all my mandarin oranges...

Oh man, these oranges deteriorate real quick in our hot weather. I chucked as much as I could into the fridge... in every nook... to a point no one cares to open the fridge - when they do, some oranges will be falling over, and send them to chase after the rolling oranges!

Gotta find a way to get rid of these before nature do!

PS: If you have a compilation of recipes which can use up the oranges, pleassssse share with me!

Mandarin Orange Granita

Granita is an iced dessert made without milk and egg. It is similar to sorbet but only coarser. To make fine ice texture like sorbet or ice cream, I would have needed the aid of an ice cream maker... which sounds like an luxury purchase during hard times like now :-)

So, being sensitive to the public suffering (yes, I do not want to be publicly shamed like Mr Tan Yong Soon ) I chose to making granita - it does not require any special equipment and need only the most basic ingredients.


Mandarin Orange Granita

2 cups (480 ml) freshly squeezed mandarin orange juice
½ cup (100 grams) castor white sugar (or to taste)
1 tablespoon fresh lemon juice
1 tablespoon Cointreau (orange liquor, optional)

1. In a large bowl or measuring cup combine first 3 ingredients. Stir until the sugar has dissolved.
2. Pour the juice mixture into a plastic container (a shallow one what expose more surface area is preferred). Cover and place in the freezer until it is completely cold (about 1 hours).
3. When the mixture is about to set, use a fork to break up the ice.


4. Put it back to the freezer, and repeat step 3 at 30~60min interval (depends on your freezer) for 3 times.
5. Add cointreau (if using) and stir well for the ice to absorb the liquor. Serve.

Notes:
  • I only use a coarse strainer (like the one in pix) to strain the juice. Some of the pulp will be present in the granita, which adds some bite that I enjoy. But if you prefer a smoother, strain to remove the pulps.

  • It is important to check the mixture regularly if this is first time you making it. We need to break up the ice particles before it freeze totally. Once it turns into ice block, it will be difficult to agitate with fork.

  • I didn't weight the amount of sugar. I add 1 tbsp at a time, and check the taste. The amount depends how sweet the fruit is, and your personal liking. It has to be sweeter than you want becos when it is frozen, the sweetness will be milder.

  • Do not omit lemon juice if you can help it - it brings out the sweetness and flavour of mandarin orange.

  • Omit Cointreau if you are making for kids (unless you want them to turn into alcholics at tender age). This is an orange liquor which adds flavour.

Friday, February 6, 2009

Banana Oatmeal Cookie


No need to continue reading.

This is a failed attempt in trying to use up the banana.

I used the same oatmeal cookie recipe (which was really yummy), added some mashed banana, and it metamorphose into some softee yucky stuff which eventually found its way to Semakau Landfill...

Thursday, February 5, 2009

Black Vinegar Pork Trotter (猪脚醋)


This is a classic confinement food in Asia which is served to woman who has just given birth. Every ingredient used in this dish has it's specific value:


  • old ginger will expel the "wind" in new-mummy's tummy,

  • vinegar purifies blood and cleanses the arteries of stale blood, at the same time, it "dissolves" the calcium in trotter's bone, which in turn makes it easier for the mother to absorb into her body.

  • brown sugar puts a check on "dampness".

  • pig trotter (knuckle) is rich in collagen which help to strength joints (and reduces wrinkle... but that's another story.)

  • sesame seed oil promote blood circulation

  • egg to nourish the body
Back in my hometown in Malaysia, this dish is often distributed to the fellow "villager" during the confinement period.

I had this every day (and every meal) for a straight 40 days post-natal. Now I wonder why I didn't grow sick of it then. Anyway, I was missing this yummy dish the other day and ordered 1 when we were having dim sum at Ah Yat. It was ok but lack oomph. So I decided to make my own. This recipe is a combination from my MIL & my mom.

It is more complex but I think the end result makes up for the extra work.


Black Vinegar Trotter
Ingredients:
1 pig trotter
1 bottle (375 ml) black rice (sweet) vinegar
1 bottle (375ml) sour black vinegar
400g old ginger - lightly bruised.
2 tablespoons sesame oil
1 cup boiling water [may use more water if you like]
brown sugar to taste
3 hard-boiled eggs [optional] - shelled
Method:
  1. Clean & remove hair from the pig's trotters. Cut into serving pieces. Leave in a pot with cold water and bring to boil on low fire. By then you can see the skimish stuff and what knots floating on the surface. Remove and drain. Clean off any debris on the trotter if any.
  2. Lightly bruised old ginger. Leave it under strong sun for full day. Or take a short cut like me - spread out in a baking tray and leave it in the oven 100C for an hour. This step will add aroma and hotness which in turn intensify the dish. If you ain't keen, just skip this step.
  3. Heat Sesame Seed Oil. Fry ginger until fragrant.
  4. Add the cleansed pig trotters and stir-fried well for 5 minutes. Add both types of vinegar, water, brown sugar and bring to boil.
  5. When boiled, pour everything into the claypot (I used crocker pot). Simmer for about 2 hours or until pig trotters become soft and tender. (I turn my crocker pot to AUTO and leave it to cook overnight.
  6. When cooled, refrigerate for 2 hours or until it jellified. This process enables me to skim off the fat on top. Again, this step is optional.
  7. Add shelled hard-boiled eggs 1/2 and hour before serving. Do not simmer the egg for too long or it will shrink and harden.
Notes:
  • The favour improves upon standing for days! I made a big pot though I am the only person eating this at home. At every end of day, I bring it to boil so as to make sure it does not turn bad.
  • When buying trotter, use only front hock cos the hind is very oily.
  • Sweet vinegar is avail at NTUC supermarket. The brand is Singlong. If can't get, can just use the sour vinegar but my MIL says using 2 different vinegar will add layers of flavours.

Wednesday, February 4, 2009

Healthy Oatmeal Cookie


Hope all of you had a most wonderful niu year. It's a busy busy time, and even more busy when we make our rounds paying respects to our relatives with the little one in tow!
But I was rewarded... by several well-guarded recipes. Like this one here - it comes from my aunt... She is selling this so I can't share the recipe. I have got another recipe eggless Almond Cookie which is her best selling item! I shall try it out after I clear my cashew nuts!

I brought a few jars of cookies to a gathering and this particular was the first to be wiped out!

Monday, February 2, 2009

Healthy Taro Root Cake (糙米芋头糕)


It is not often to find me forgoing the convenience of commercial offering to ease my culinary (mis)adventure. For the yam cake, I would usually using ready rice flour. BUT today, I blended my own rice flour using the healthier red cargo rice. :-)

Red cargo rice an unpolished rice, similar to brown rice. The colour of the bran is red, and hence the name. Our usual white rice has its husks & bran removed during the milling process which strip all the nutrients. In unpolished rice, only the husk (the outer "coating" of the grain) is removed. All the nutrients, vitamins and minerals which are stored in the bran layer is intact in the bran and germ.

Despite all the benefits, unpolished rice is not very popular in our diet as it is much more chewy than the standard white rice of which asian favour for the soft & fluffiness. But having it blended and steamed into savoury cakes make it more acceptable to my fussy family a wider audience! Also, personally I find the red/black speckle in the rice cake very appealing! Try it when you some time to spare:


Rice Batter
200g brown/red cargo rice, cleaned, soaked in clean water for overnight and drained.
1000ml chicken stock or water
2 tbsp tapioca flour
1 tbsp tang mien

  • put soaked rice and water into a blender and blend into a smooth batter. Add in tapioca flour, tang mien and mix well.
Continue per your usual recipe or you can get it here .

Red rice lends a light red hue to the cake:


I love it when I eat healthy. (Not that I am a healthy.)

Sunday, February 1, 2009

Sweet and Simple Bakes: Banana Chocolate Bread

Sweet and Simple Bakes: Banana Chocolate Bread


When I had some leftover bananas to clear, I was comtemplating which recipe to use; Pichet Ong's "The Sweet Spot", or SSB.

In the end, I went with my gut... SSB's recipe is always trusty and produces predictable results!


And Boy, I was right!

This muffin uses the rather unusual Rub-in method. This is my first time making a Rub-in muffin! It may look a little messy but the end product is worth getting my fingers dirty! Literally.

The bread (or muffin, as it is more commonly known in Singapore) is soooooo soft and fluffy. It has a nice citrus presence that cut the sweetness of banana. I packed them in a box, and totally forgotten about it until the 5th day... it was still nice and soft :-)

Banana Chocolate Bread

250g self-raising flour
Pinch of salt
1 tsp baking powder
100g fine sugar (original 150g)
100g butter, softened
2 eggs
1 tsp vanilla extract
Finely grated zest of 1 orange
475g whole bananas (about 4 small ones), peeled
75g dark chocolate chips

1. Preheat the oven to 170oC. Lightly butter and line the loaf tin with parchment paper.
2. Sift the flour, salt and baking powder into a large bowl. Add the sugar and butter and, using your fingertips, rub it in until the mixture resembles coarse breadcrumbs.
3. Whisk the eggs, vanilla extract and orange zest in another bowl. Add the bananas and mash very well with a potato masher. Add the chocolate chips.
4. Make a well in the centre of the dry ingredients and pour in the banana mixture. Gently but thoroughly bring all the ingredients together with a wooden spoon, then pour into the prepared loaf tin.
5. Smooth the top and bake in the oven for 1-1 ¼ hours or until a skewer inserted into the middle comes out clean. Allow to cool for 5 minutes before removing the cake from the tin and leave to cool on a wire rack.

Baker’s Notes:
· I halved the recipe and got 8 cupcakes.

· I baked in muffin pan, took 20min in oven only.